Important: In order to install Intella Connect as a Windows Service, one must fulfill few preconditions. Please do not proceed with the installation until you read the reminder of this document!
If you fail in doing any of those two steps, then Intella Connect may not start at all or behave unstable (including making the server machine unresponsive). Please read the reminder of this document carefully before you proceed with the installation.
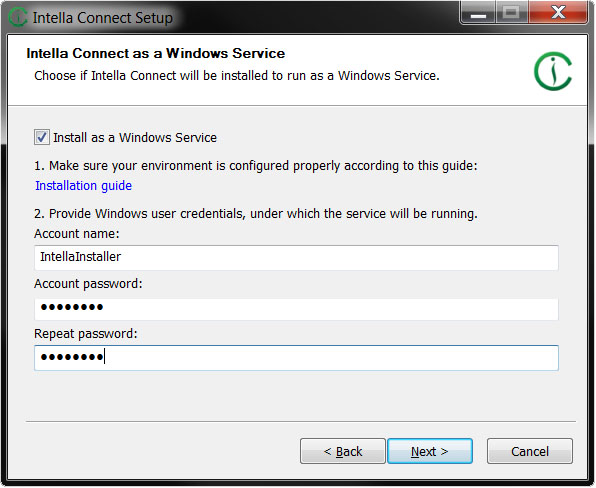
During installation, on an installer page dedicated to Windows Service installation you will be asked to provide credentials for Windows user account. This is necessary as Intella Connect needs to run in the context of a particular Windows user. Make sure not to have the service installed to log in as LocalService, NetworkService or LocalSystem.
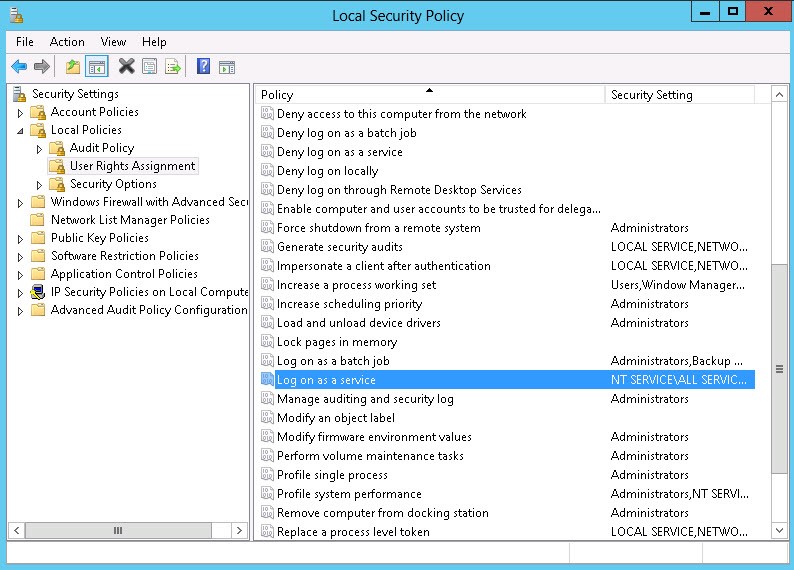
You must first assign the user that is installing Intella Connect the right to “Log on as a Service.” If you are installing Intella Connect on a workstation or member server, you can do this either by configuring the “Local Security Policy” or by creating and configuring a Group Policy Object for that host.
If you are installing Intella Connect on a Domain Controller you can either configure “Domain Controller Security Policy” or create and configure a Group Policy Object. To configure the Local Security Policy which is available under Administrator Tools and expand Local Policies – and click on “User Rights Assignment.” Then select “Log on as a service” and select the user or group for the account that will be doing the installation.
To configure a Group Policy Object, go to Computer Configuration – Windows Settings – Security Settings – User Rights Assignment and once again select “Log on as a service.”
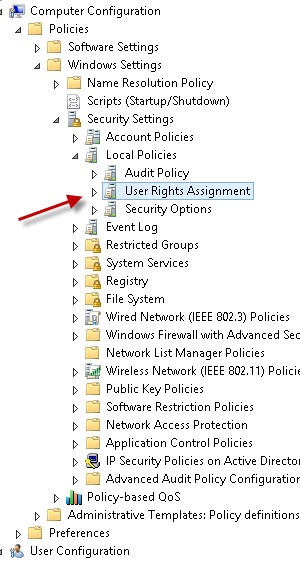
Then select the appropriate user or group.
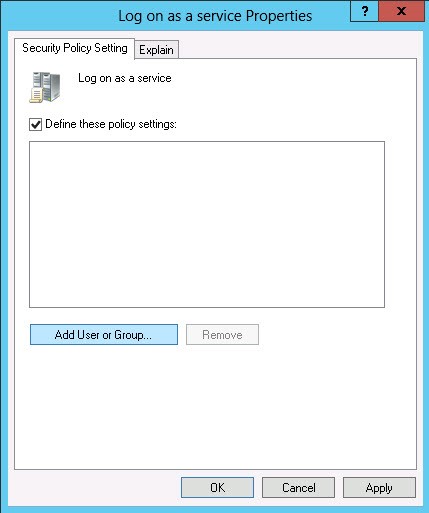
Once the “Log on as a service” right has been configured, the assigned user can then install Intella Connect as a Windows Service. In install wizard, during the step outlined below, the login credentials of the user configured with the “Log on as a service” right must be input.
C:\Windows\SysWOW64\config\systemprofile\Desktop
C:\Windows\System32\config\systemprofile\Desktop
Hint: It’s best to create those folders using “md” command from terminal ran as Administrator.
Those folders will be used briefly for storing some temporary files and have to exist when the Service is first started.
The firewall on Windows Server operating systems is more restrictive than in desktop Windows operating systems. This will manifest by traffic on loopback network interface (127.0.0.1 or localhost) to be allowed, but any packets incoming to local network interface (from outside of the machine) to be dropped. Thus, using browser on the server to navigate to Intella Connect dashboard, will show the page without any issues, but when using browser on different machine on the network, it will fail to display the dashboard.
To allow incoming traffic on the server:
If the port on which Intella Connect is running will be changed at any point later in time, then this firewall rule will need to be updated as well to reflect the port change.
By default, a security setting restricts local accounts that are not password protected to be able to log on only at the physical computer console. The Intella Connect Windows Service will be aborted silently during automatic startup and if attempted to start it manually, it will show following error: Error 1069: The service did not start due to a logon failure.
Important: Computers that are not in physically secure locations should always enforce strong password policies for all local user accounts. Otherwise, anyone with physical access to the computer can log on by using a user account that does not have a password.
To allow Intella Connect Windows Service to run with user account that is not password protected:
In some situations it’s desirable to install, uninstall or reinstall Windows Service associated with Intella Connect, without the need of going through the full (un)installation of the software. It can easily be achieved with a help of connect-service.bat batch script.
One can follow these steps:
cd C:Program FilesVoundIntella Connect 2.0.1
connect-service.bat uninstall
connect-service.bat install CONNECT_USER CONNECT_USER_PASSWORD
Finally, to check if everything went fine it’s best to open “Services” tool built into Windows and verify if “Intella Connect Service” entry is listed as a running Service. There should also be “Log On As” property matching the account specified in step 4. If it doesn’t show up there, then you should modify it there directly by right clicking and opening “Properties” (“Log On” tab).