Starting with the version 1.9.1 we have added Batching and Coding functionality to Intella Connect. Batching allows a large number of documents to be broken down into smaller (more manageable) groups called batches. Batches can be assigned to reviewers for a linear document review. The Coding feature allows the user to apply subjective coding (via a coding layout) to a document during the review of a batch.
Custom coding layouts containing the coding options can be created and applied to a batch when the batch is being created. This allows for coding layouts with different parameters to be created to match the data, type of investigation and workflow for a particular case. The coded data is added to the Details table and can be exported from the case in several formats (CSV file, load file etc.) if required.
Before we can batch documents and code them, we need to create a coding layout. Coding layout defines which tags and how can be applied to an item. Each layout consists of several elements called Coding Fields which are derived from tags existing in a case.
Note: To be allowed to manage Coding Layouts, user has to be granted with ‘Can manage coding layouts’ permission.Note: It’s of vital importance for case managers to understand how tags relate to Coding Fields.
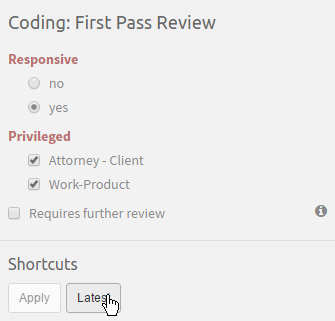
We would like to create a typical coding layout for a “First Pass Review”. Before we start then, let’s look at what we would like to achieve:
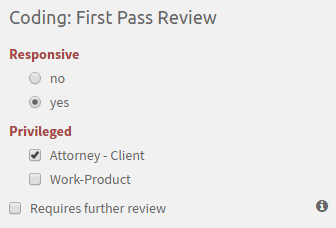
This particular layout consists of three coding fields:
As you can see each one of them renders a bit differently. The first field is a classical Radio button field. It allows to select just one value from the provided set of options. These options are called Coding Options in Intella Connect. A Coding field can have zero, one ore many Coding Options, depending on its type and the tag from which it was created. Note that this field is considered a mandatory (required) field. When coding an item using this coding layout, user would have to make a decision as to which Coding Option applies to this item (in this case either “yes” or “no”).
The second field is also a required field, however of a different type. This time Coding Options are rendered as Checkboxes. This type of a Coding Field will allow user to select one or several Coding Options.
The last field is also a Checkbox, however this time it’s not required and have no Coding Options to choose from. Therefore is rendered as a standard Checkbox.
To create such Coding Layout one must create appropriate tags structure beforehand, as in Intella Connect Coding Layouts are created based on tags. A typical tags structure that would allow us to create such layout could look like this:
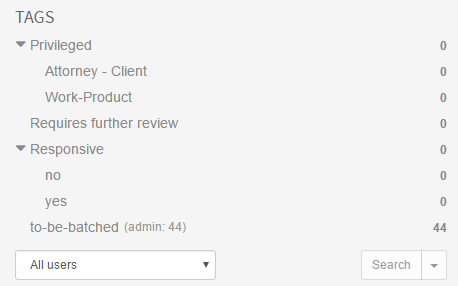
As you can see few of those tags are hierarchical tags. Several types of Coding Fields will require a hierarchical tags in order to function properly (Radio fields and Dropdown fields).
Note: In Intella Connect each Coding Field and its Coding Options correspond to an existing Tags structure in a given Case.Note: Only first level of hierarchical tags is supported in Coding Fields. Any subsequent levels will be ignored and not rendered.
Now that we have a solid tags structure to base our Coding Layout upon, we can proceed to creating our layout.
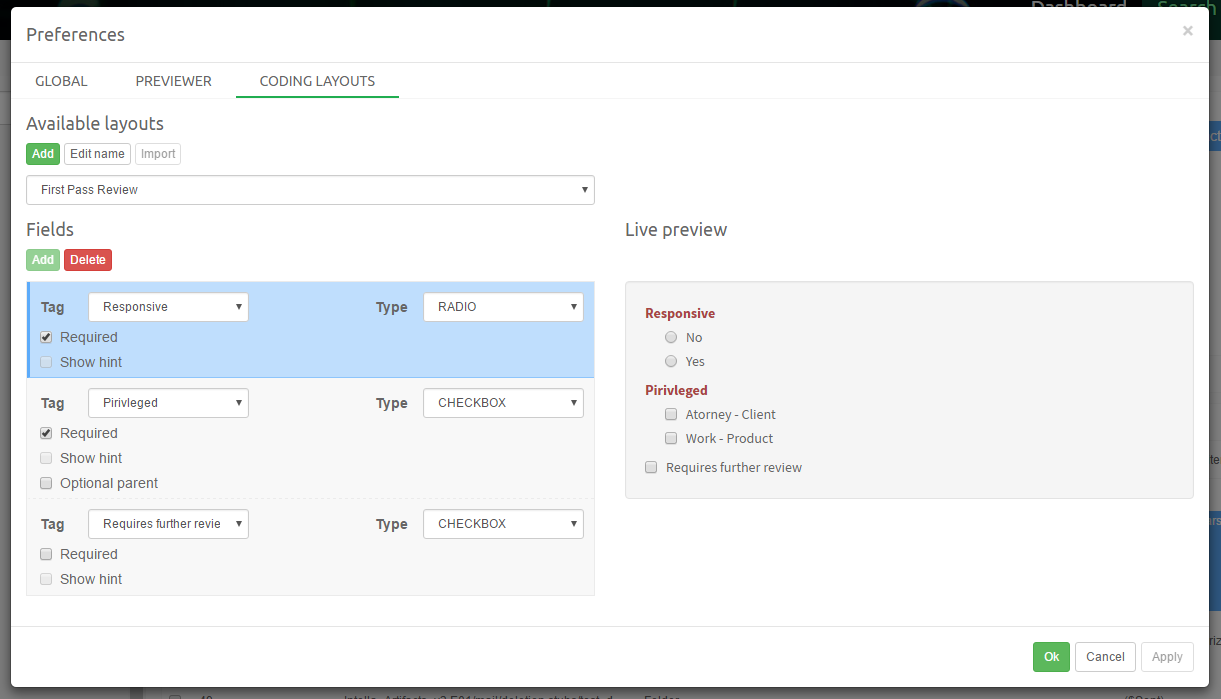
Coding Layouts are created, modified and imported via Preferences. When you try to create a new Coding Layout you must provide a unique name for it. If layout with the same name exists you won’t be able to add it. You have also an option to allow for this layout to be shared among other cases. This settings is switched off by default to prevent leaking of sensitive information (like custodian name) which might be used in a Coding Field. After new Coding Layout is created, you can start adding Coding Fields to it. This is rather simple task thanks to our visual builder. It allows you to add/remove and change properties of each Coding Field and immediately see results of this change in the Live Preview on the right. Coding Layout for tags structure from our example can be easily constructed by choosing the following options:
Now that our first Coding Layout is created, we can proceed to batches creation.
Batches are created in the main Search View. It’s the job of a case manager to search and find any items that ought to be split into batches first. This step shouldn’t be taken lightly, as after batches are created one cannot add any more items to them. Therefore one should make sure if he wants to include duplicates, conversations, children and/or parents of resulting set prior to creating a batch.
Note: Batches creation algorithm automatically orders batches chronologically (according to ascending Family Date). This allows to maintain proper ordering of items across multiple batches.Note: Batch creation is governed by a ‘Can create review batches’ permission. Users who are not granted with it will not see the Create Batches action in the contextual menu.
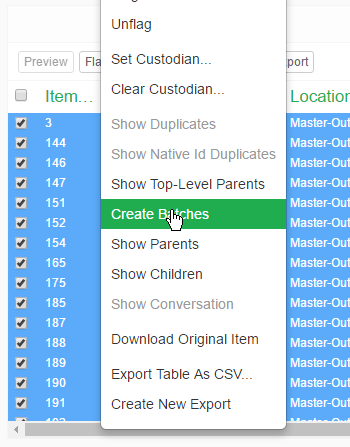
In the main Search View select all items that you want to include in batches and right click in Details Panel to bring up contextual menu, then select Create Batches.
This will cause an additional modal dialog to appear:
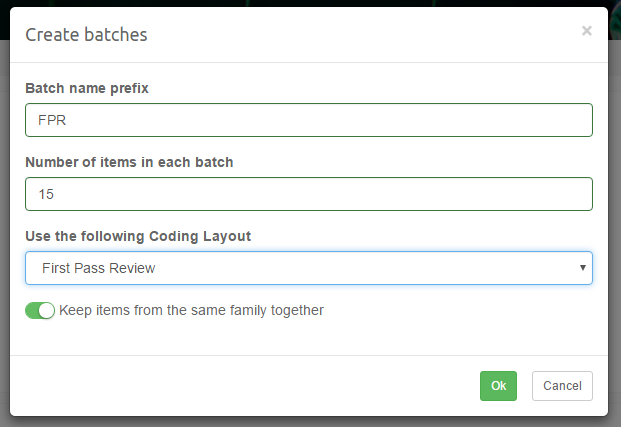
The options used here should be pretty straightforward. The only thing requiring attention is the Keep items from the same family together. This allows, for instance, to keep emails and their attachments in the same batch. Using this option can cause the total items count assigned to a batch to extend the count specified as the batch size.
Note: If certain family members were not added to the set of items from which the batches are being created, then those items won’t be automatically added to batches even if “Keep items from the same family together” option is turned ON. It’s always the job of the user creating batches to make sure that all items that he wishes to include are added to set before “Create Batches” action is called.
After one presses the OK button it should be a matter of seconds before batches are created and appropriate notification is shown to the user. From this point forward reviewers can find new batches in the batches list view.
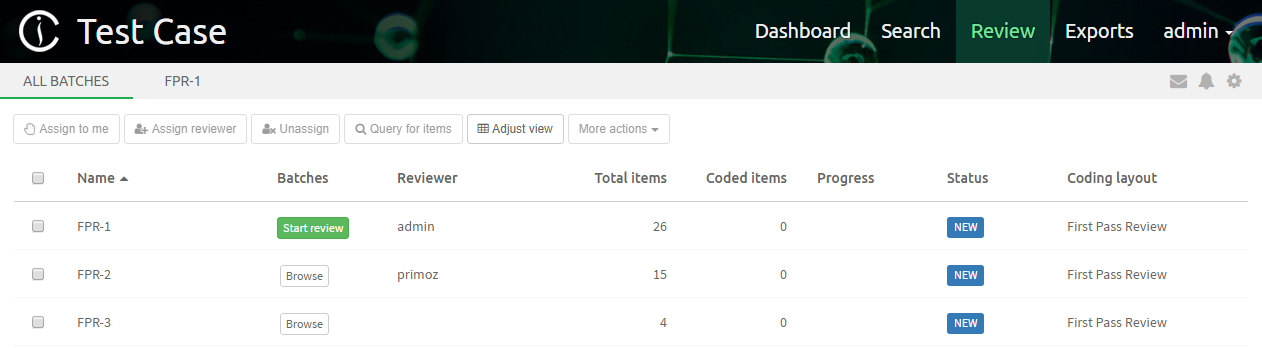
All batches created in the case are listed on Batches List. This view allows you to see details for each batch, including its basic information along with current state of the review. You can select multiple batches by pressing a CTRL button on your keyboard and clicking on multiple rows. Use buttons in the menu ahead of the list to control the state of selected batches.
Depending on permissions of currently logged in user, you will see a subset of these buttons:
Available columns in Batches List:
Name - the name of the batch including the auto-generated number suffix
Actions / My batches - renders auxiliary buttons which can be used to open a batch for browsing or review
Reviewer - the name of the user who is currently designated as batch reviewer
Total items - number of items inside the batch (note: this number can be larger for some batches if Keep items from the same family together was selected)
Coded items - number of items for which a reviewer applied some coding decision
Progress - ratio of coded to total items represented as a percentage
Coding layout - the name of the Coding Layout used in this batch
Created - day of creation
Completed - day of completion
Clicking on the Adjust view button will toggle a panel offering additional customization of the Batches List view. It allows to:

Depending on permissions assigned to your account, you may or may not have an option to freely reassign batches among reviewers. In most cases though reviewers will only have an option to assign a batch to themselves. Once the batch has been assigned, that user will see a link to the batch listed next to the All Batches link at the top. Batches List will also contain a column with action buttons, one of them being Start Review. This situation is illustrated on the picture in the previous section.
To start reviewing documents in the batch, simply click on the Start Review button.
As soon as the batch is opened the Items List will start populating with information about items inside current batch. On top it will render the total count of items inside this batch. Each item has an icon associated with it which changes it’s color based on the item’s type. It makes it easy to distinguish items of common file types. Each entry will also render item’s best title and an information about associated custodian, if available.
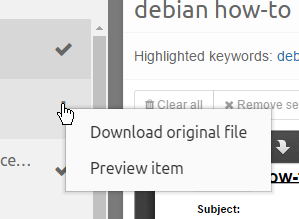
When the mouse icon hovers over an item then a menu icon will be shown on the right side of item’s list entry. When clicked it will open a menu allowing to:
Items List keeps track of currently opened item. This active item entry will be highlighted with a darker gray. Also, if any coding errors will apply to an active item, then it will be highlighted with red color. This makes it easy for the user to notice that he must take additional actions in order to fix this problem.
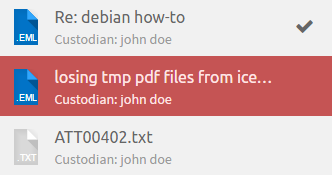
The first item in the screenshot located above has also been coded in this batch. This can be easily noticed by a thick, gray check mark located on the right side. As soon as other items are properly coded similar check marks will be rendered for them too.
Clicking on any item in the list will cause Simplified Previewer to load item’s data and Coding Panel load taggings for given item. Based on those taggings Coding Panel will populate its fields. This will happen only if active item is properly coded. If user has CAN_SKIP_CODING_OF_ITEMS permission, then this validation is skipped and user can navigate between items freely.
To further customize the appearance of this list, you can click on the menu icon (located on the right of label informing about the number of items in the batch). This will open a modal window with additional options:
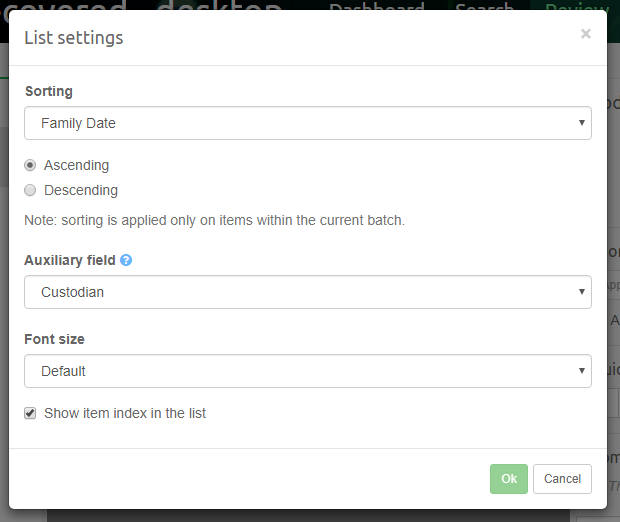
Simplified Previewer is a close counterpart to our regular Previewer used to inspect items closely. To remove unnecessary clutter from the sight, we decided to support three tabs only:
These tabs work the same as their counterparts in regular Previewer.
Simplified Previewer allows reviewers to apply their own custom keywords to be highlighted in Contents and Redaction tabs. It’s possible to create a custom list of keyword searches and/or use one of Keyword Lists created in the main Search View. The full search syntax is supported.
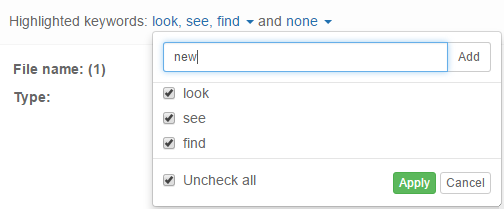
On the screenshot above one can see three custom keyword queries being highlighted and none Keyword Lists being used.
If currently previewed item has any attachments, then they will be displayed in a separate panel in the bottom of Contents section. Clicking on any of the buttons representing individual attachments will open up a new Previewer for this item. One can also see all attachments in a form of a list by clicking on See all button.

Coding Panel is the centerpiece of the entire Review View. It consists of few main components:
Coding Form allows user to code items by switching appropriate Coding Fields ON or OFF. Whenever new item from batch is loaded this panel will automatically fetch all taggings from the server and initialize fields based on that information.
Note: Coding Form is always fetching taggings information coming from all users, not just from the current reviewer.
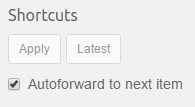
Changes in Coding Fields are not automatically sent to server. User must always make an explicit decision to apply these changes. This is where Shortcuts Panel come in handy.
Shortcuts Panel has three controls, illustrated below:
Any action that would commit changes to Coding Fields triggers a coding layout validation first. Validation is a very simple process - it goes through every required field in the current coding layout and checks if such fields have been properly coded. A required Coding Field is considered coded properly if it has been set, in case it has no Coding Options assigned, or if at least one of its Coding Options is set.
Note: Batch progress is computed based on the count of properly coded items. This is triggered only on two occasions:- when batch is created (in order to respect taggings already applied to items in batch)- when coding is applied in the Coding PanelNote: It’s important to understand that applying coding decision to item might result in removing taggings from other users (only the ones which are used in a Coding Layout). That can happen if we had “Field” tag mapped as a radio Coding Field and “John” tagged item with “Field/OptionA”. Afterwards when “Jane” codes it as “Field/OptionB” John’s tag would be removed as “Field” can have only one option sets.
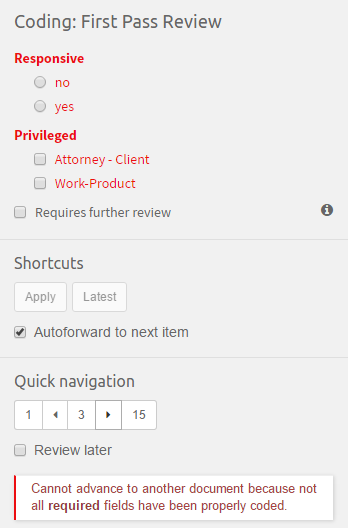
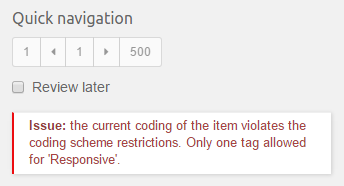
In case the Coding Form validation fails, the Coding Fields containing errors will be highlighted in red and additional warning will be presented in the Notifications Panel. This is illustrated below:
Another case of error you might encounter happens when Coding Form detects that tags have been assigned to currently displayed in an invalid way. It may be a result of tagging an item outside of Coding Form in a way which is not supported by one of Coding Fields. A typical example of this is to have a Coding Field of Radio type, which supports only mutually exclusive choices (ex. ‘correct’ or ‘incorrect’), but item was tagged with both (‘correct’ AND ‘incorrect’). In this case Coding Form cannot know which coding decision was right, and will render an error notification illustrated below. To get around this situation one must open a regular Previewer for item in question and manually fix tags causing problem. After going back to Review the message should be gone.
The simulation of applying latest coding decision onto current item is illustrated below. Note the semi-transparent overlay over Coding Form and the fact that some of controls become selected to reflect latest coding decision.
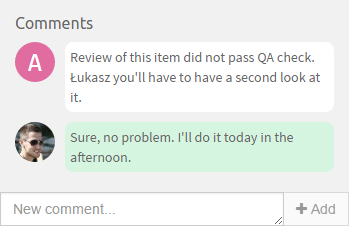
Comments can be added to item directly from Comments Panel. This works exactly the same as with regular Previewer, however editing or deleting comments is not allowed. In case it was needed one can still do that from Previewer.
It can happen that reviewer will be presented with the following notification:
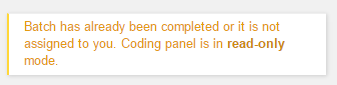
This prevents some potential mistakes by reviewers who could modify batch which is already completed or belongs to someone else. This message will be presented to reviewers if one of these three conditions is fulfilled:
Coding View supports several keyboard accelerators which allows to review items faster. To see them, please press “SHIFT + ?” while in Coding View.
Coding Layouts are stored globally in Intella Home folder and may be optionally reused between multiple cases. You can control if layout should be shared when creating it in Preferences window. Note that since Coding Fields are closely tied to the Tags model (which is specific to each case), one must perform one additional step to reuse a layout created in a different case.
This step is called “Importing”. Coding Editor and the batch creation process will instruct you if layout needs to be imported. This is illustrated below:
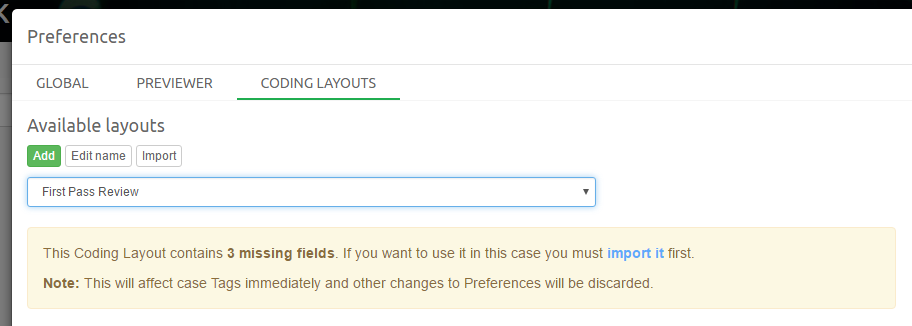
When user presses the Import button or “import it” link then Intella Connect will read fields from the selected Coding Layout and create appropriate tags in the current case. From now on this Coding Layout can be used like if it were created for this case.
Note: After importing Coding Layout we recommend checking if the tags structure was correctly created.
While creating batches one must always specify a Coding Layout. However, there is one special layout called “Default”. This one is automatically generated on the fly and it always contains fields mapped to all tags created in the current case. None of these fields are required.
Batch progress is initially computed based on the state of taggings applied to items. Therefore it might happen that the batch is already showing some progress right after it has been created. That is deliberate behavior, as it sometimes might happen that part of the review was already done prior to batches creation.
After batches have been created the only event triggering batch progress recomputation is an explicit applying of any coding decision. So if tags were applied externally (via regular Previewer or Search View) then Coding Panel will reflect these changes, however batch progress will not pick this up automatically. The golden rule here is that after batch is created only working with the Coding Panel can alter batch’es progress.