6. User management
6.1. Admin user password
To change the admin user’s password, click on Settings in the left side menu in the Intella Connect Dashboard.
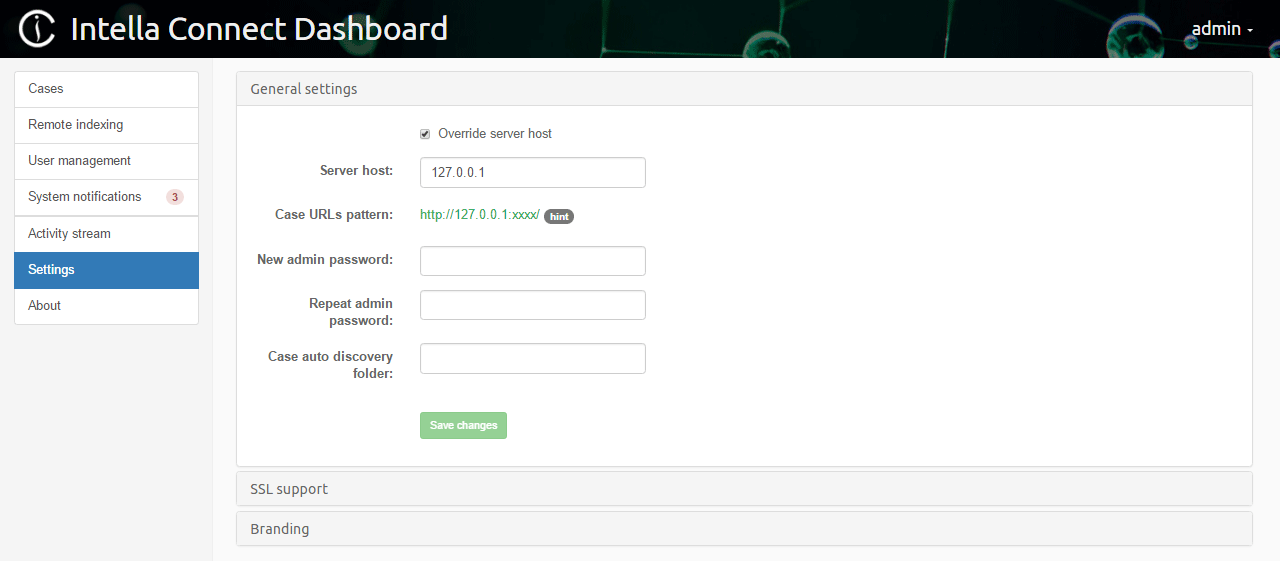
The fields New admin password and Repeat admin password are used
to change the admin user’s password. Once these two fields are filled in, click
on the Save changes button to change the password. After
clicking the button, the notification Password changed successfully will be shown and you will be logged
out from the Intella Connect Dashboard. To log back in, please use
admin as user name together with the newly configured password.
6.2. Managing Users and Permissions - the RBAC model
For managing Authentication and Authorization Intella Connect uses a mechanism called Role Based Access Control (RBAC). To effectively manage user accounts and their permissions, it is advisable to get familiar with this mechanism. It is a very simple yet powerful tool, allowing for full flexibility in creating various levels of access restrictions.
Below we describe the key entities used in an RBAC model:
User (account) - represents a single person who has access to an application. Each user is identified by a unique username and password, which needs to be presented for authentication purposes. This is how Intella Connect is able to recognize their identity and determine what each one of them can or cannot do.
Permission - represents access to a given resource or operation, for example the ability to tag items, access to a case or to a specific item. Permissions can grant or prohibit access to a certain action. There are different types of permissions defined in Intella Connect. Administrators should get acquainted with them, because only then they will be able to properly manage access to various parts of Intella Connect.
Role - roles can be considered as a set of permissions with a unique name. Roles are defined by server administrators. There is no limit on the number of roles that can be created. A roles can have zero or more permissions assigned to them. Permissions assigned to a role effectively define what actions a user with a given role is entitled to.
Note: RBAC gives Administrators unlimited flexibility in defining complex hierarchies of users closely matching their own organizations. However, we strongly recommend keeping the number of roles relatively small, so that the whole model remains manageable over time.
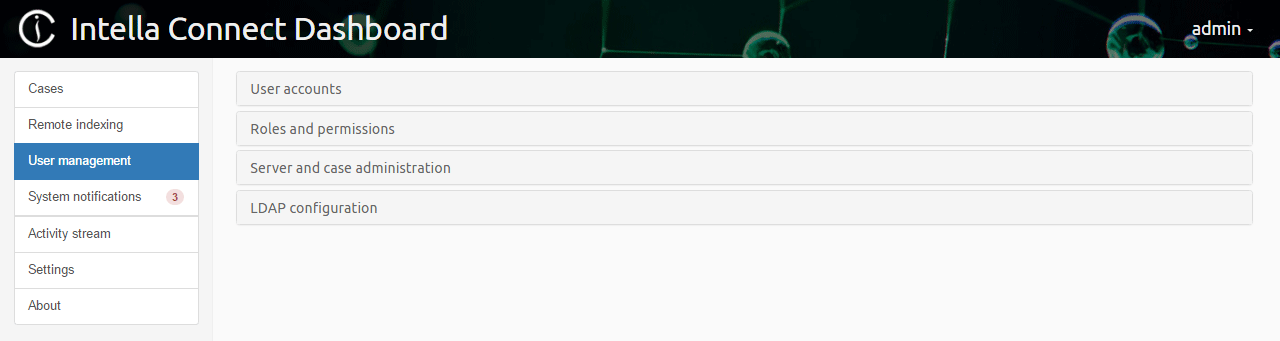
For simplicity, managing user accounts has been separated from managing roles and permissions. Both those features are accessible after clicking on User management in the left side menu in the Intella Connect Dashboard.
6.3. Create new users, modify and revoking existing users
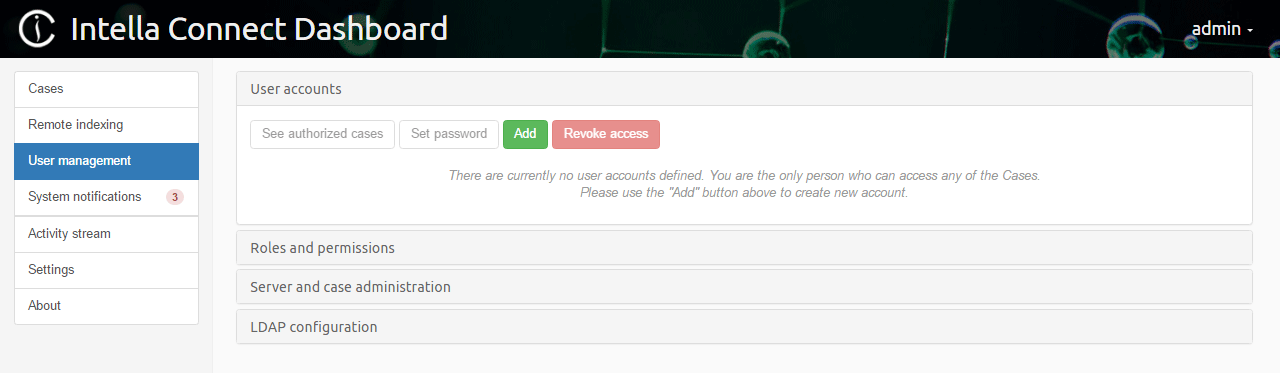
To create new users, modify and revoke existing users, click on User management in the left side menu in the Intella Connect Dashboard.
Important: Revoking of the user account will not result in such account being deleted which means that creating new user account with the same username will make revoked account active again.
6.3.1. Create new user
New users can be added by clicking on the Add button.
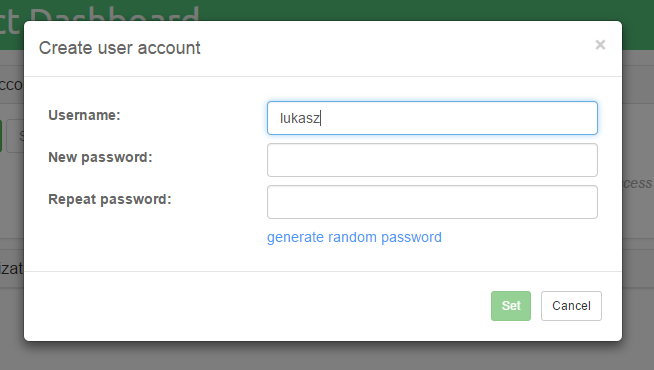
Note: Passwords can be generated by clicking on thegenerate random passwordlink.
Once the user name and password fields are filled in, click on the
Set button to add a user.
6.3.2. Usernames
Intella Connect uses case insensitive comparison for usernames. This means, that “Admin”, “admin” and “aDmIn” are essentially the same user. In various places in the user interface the username will be rendered using a lowercase. The current set of acceptable characters in usernames contains of:
- digits (0-9)
- letters (a-z, A-Z)
- the underscore (_)
- the at sign (@)
- a dot (.)
Usernames should be at least 3 characters long.
Note: Despite the fact that Intella Connect renders usernames in lowercase, they are never modified when compared on the server (comparison simply ignores casing). Therefore Intella Connect is safe from issues that might be a result of lowercasing UTF-8 characters using custom system locale.
6.3.3. Change user’s password
Select the user whose password you would like to change and click on the Set password button.

Once the password fields are filled in, click on the Set button to change the user’s password.

Note: Changing a user’s password will take effect after the user’s session expires or when the case sharing is restarted.
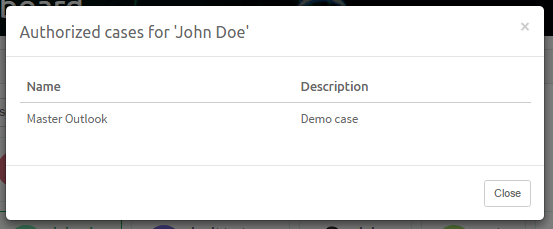
6.3.4. User’s authorized cases
Select the user whose list of cases (to which that user is authorized) you would like to see and click on the See authorized cases button.
6.3.5. Revoking existing user
Select the user for whom you want to revoke access and click on the
Revoke access button.
After confirmation, the selected user will no longer have access to any part of the Intella Connect system.
Note: Revoking a user’s access will take effect after the user’s session expires or when the case sharing is restarted.
6.4. Managing Roles and Permissions
Intella Connect comes with a set of predefined permissions that can be assigned to any of the roles defined by the server administrator. It also comes with two default roles called Reviewer and Administrator.
Backwards compatibility notes:If you are migrating from previous versions of Intella Connect 1.7.x, the Reviewer role will be created for you and assigned to all the users that previously had access to a particular case. This means that you will not have to perform any manual actions yourself when upgrading to Intella Connect 1.9.1.If you are migrating from previous versions of Intella Connect 1.8.x, the Administrator role will be created for you and assigned to the “admin” user that previously had unrestricted access to Intella Connect Dashboard. This means that you will not have to perform any manual actions yourself when upgrading to Intella Connect 1.9.1 and you will still be able to login using “admin” account as you used to with earlier versions.If you are migrating from previous versions of Intella Connect 1.9.1, all users having “HAS_ACCESS_TO_A_CASE” permission will be granted with following permissions automatically:- CAN_USE_DASHBOARD_UI- CAN_USE_SEARCH_UI- CAN_USE_REVIEW_UIIf you are migrating from previous versions of Intella Connect 2.0.0, all users having “CAN_EXPORT_ITEMS” permission will be granted with the “CAN_DOWNLOAD_ORIGINAL_ITEM” permission automatically. Moreover, users with “CAN_CREATE_BATCHES” permission will be automatically granted with “CAN_MANAGE_CODING_LAYOUTS” permission.This automatic conversion affects the “auth.xml” file located in the Intella home directory. A backup file with the name “auth.xml.bak-*” will be created automatically.WARNING: after this conversion is done switching back to older versions of Intella Connect can result in clearing all roles and permissions previously defined. If this happens user can recover part of the RBAC model structure from the mentioned backup file, however changes made to the model after it has been created will not be preserved. Therefore we strongly advise to back up Intella and Intella Connect home directories before upgrading or downgrading the software.
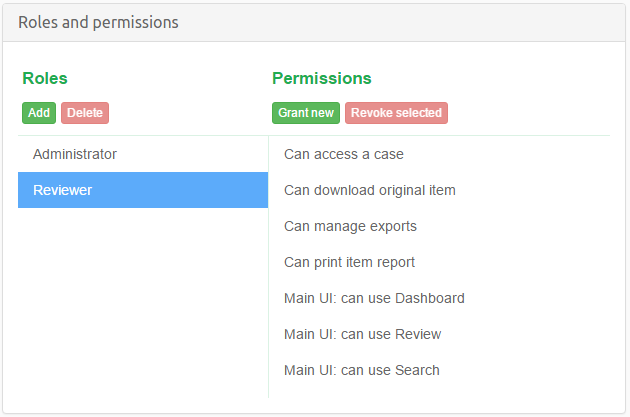
The Reviewer role has seven permissions assigned to it by default, which lets users with this role to:
- access cases in which they are assigned this role
- download original item
- create export packages
- print item reports from inside the previewer
- can use Dashboard view
- can use Review view
- can use Search view
This is demonstrated in the picture below, along with the user interface for RBAC management.
Note: In this section we only manage roles and their permissions. The last step will be to assign some roles to users in a context of given case, but this task is performed in theCasessharing panel.
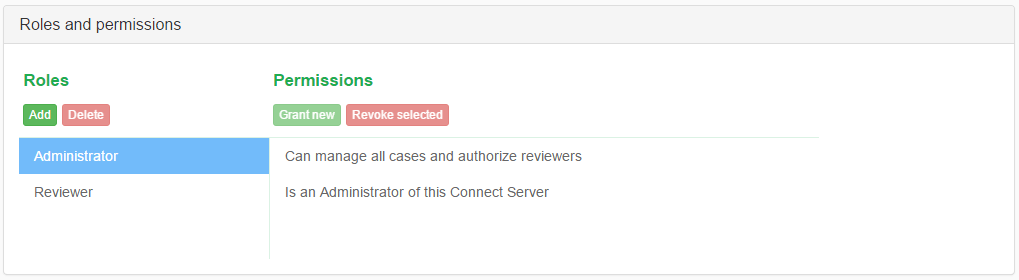
The Administrator also comes with few default permissions assigned to it. Those allow to manage all cases handled by Connect and also manage users and modify crucial server settings. This role cannot be removed or altered. Moreover, the user “admin” has this role assigned by default and it cannot be revoked from this user. This prevents situations where administrators would accidentally lock themselves out from access to Intella Connect by not leaving a single user with server management permission. The user “admin” is also the first user to create roles for other users with server or case management permissions and assign them.
6.4.1. Adding and Deleting roles
Adding new roles is straightforward: click on the Add
button located underneath the Roles label. You will be asked for
a name for the new role. Roles names should be unique. The new role will be immediately visible in the roles list.
Note: After a role has been added, it does not have any permissions assigned to it. It is also not assigned to any user automatically. This means that after a role has been added, it does not affect effective user permissions yet.
You can also delete roles easily, by selecting them in the roles list and
clicking on the Delete button. You will be asked for confirmation, after
which the role will be removed from the list. Deleting a role does not mean that
this deletes the permissions associated with it, as those are
defined by Intella Connect itself.
Note: Deleting a role that was already assigned to some user will have an instant impact on the user’s permissions, they will be recomputed instantly. This will happen even if the case is currently being shared.
6.4.2. Granting and Revoking permissions
Granting (or adding) and revoking permissions works very similar to roles management. Remember that permissions are always managed in a context of a role, so you have to select a role first in order to see what permissions are assigned to it already and modify this set.
Clicking on Grant new will open up a modal dialog that is used for
selecting a desired permission. Permissions have their own unique internal IDs which
are hidden from the view, so in the first combobox you can see a more human-readable description that should immediately let you know what that permission stands for.
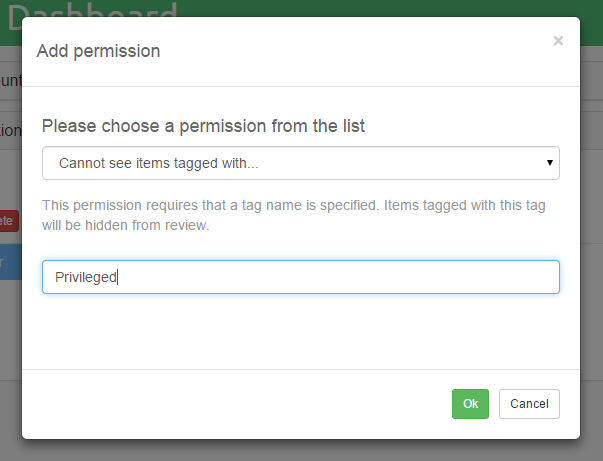
Some of the permissions can be added to a role just once (like case access), other can be assigned multiple times (like reducing access to tagged items). In the latter case, the user interface will change a bit and you will be asked to add additional data which is needed by the permission to fulfil its purpose. Again, for the example of limiting access to tagged items, you will be asked to supply the tag name so that Intella Connect knows which tagged items are considered off-limits for users with that role. The user interface should render some hints as you proceed, making the process fairly straightforward.
Granting a new permission for the mentioned example is illustrated below:
Revoking a permission works similar to deleting a role. You will be asked for a confirmation, after which the permission should disappear from the permissions list. This will have an immediate impact on the role that it was assigned to.
6.4.3. Permission types
Below is the list of permissions currently available in Intella Connect. We intend to add more permission types to this list in future releases.
Global permissions:
Can manage own cases and authorize reviewers- user with this permission will have access to Intella Connect Dashboard, specifically, sections Cases, Activity stream and About. The cases list will be showing only those cases of which this user is the creator.Can manage all cases and authorize reviewers- user with this permission will have access to Intella Connect Dashboard, specifically, sections Cases, Activity stream and About. The cases list will be showing all available cases.Is an Administrator of this Connect Server- allows users to access Intella Connect Dashboard, specifically, sections User management, System notifications, Settings and About.
General permissions:
Can access a case and participate in the review- this permission allows users to access a given case. If a user does not have this permission for a certain case, he will not be able to get past the login prompt.Can download original item- allows users to download items in their original format.Can manage exports- allows users to create export sets.Cannot see items tagged with...(this one needs an extra parameter: a tag name) - this permission allows for hiding certain items from certain reviewers, while letting others see the entire data set. Please read more below.Can delete tags and taggings from other reviewers- users having this permission will be allowed to delete tags and taggings created by other reviewers. In previous versions of Intella TEAM, only Case Manager was allowed to do that. Now this action is available to every user having this permission.Can print item report- allows users to print a PDF report for an item rendered inside the Previewer.
UI related permissions:
Main UI: can use Dashboard- allow users to access Dashboard viewMain UI: can use Review- allow users to access Review viewMain UI: can use Search- allow users to access Search view
Review/batching related permissions:
Can archive and delete review batches- allow users to archive and/or delete review batchesCan browse others batches- allow users to browse unassigned or others batchesCan skip review of items while coding- allow users to skip review of items when codingCan change any reviewer assigned to a batch or leave it unassigned- allow user to re-assign batchesCan create review batches- allow users to create batchesCan manage coding layouts- allow users to create and edit Coding Layouts
Background tasks related permissions:
Can manage background tasks- allow users to create/delete background tasks
6.4.4. Note on “Cannot see items tagged with...” permission
This permission must be used with an extreme caution because in case of any user error it can lead to disclosing of privileged items.
One must observe that always the data is organized in a tree-like hierarchy, where child items are linked to their parents. This tightly relates to the data consistency and opens an interesting question. If only the parent of an item would be hidden, where to Location Facet should place it’s children?
To avoid such purely theoretical debates Intella Connect will hide an item along with all of it’s descendants when using “Cannot see items tagged with...” permission.
Consider this: user A is granted with this permission (for “Privileged” tag) in a data set of 100 items. 10 of those items are tagged with the “Privileged” tag. One of these privileged items has 5 children, e.g. attachments or nested items. This means that user A will be able to see 85 items from this data set (10 + 5 = 15 items are hidden). The privileged 15 items will not show up in the cluster map, search results, facets, etc. If tagged items contain child items, they will be filtered from the results as well. User A will also have no access to the “Privileged” tag in the Tags facet, so he cannot himself modify it to change what he can or cannot see.
Introduction of hierarchical tags in Intella Connect has caused for this mechanism to be extended as well. Since now “Privileged” tag can be anywhere in the tag tree structure, then all tags (and items tagged with them) in a tag subtree starting with this tag will also be considered hidden. Also, tag names are no longer guaranteed to be unique in the entire tag tree. Therefore if there are several tags called “Privileged”, all of them will be managed by this set of rules.
Disclaimer about limiting access to items: use of this permission should be undertaken with caution in order to prevent leaking of sensitive data. We advise users to test this solution thoroughly before using it in production. It is also important to apply a proper workflow when limiting access to items. For instance, creating an export set first and later applying restrictions to items is a potential leak of information, because the export set could have included privileged items before any restrictions were applied.Also, if a user with access to privileged items adds them to an export package, they become accessible to all other users with access to that case and with the exporting permission.Moreover, using this permission requires much more processing power to be used on filtering intermediate results for various parts of the case database. It can also invalidate some of caches that are put in place to speed up delivering results. Therefore one must be aware that using this permission on larger cases can cause them to behave much different comparing to when this permission is not used.Finally, using permissions to hide privileged items does not mean that those items are removed from the case. They are still present in the case database, but simply excluded from the results and hidden in the user interface for those users not entitled to view them. Therefore a clever attacker could still try to gain access to privileged data by attempting various attacks or malicious usage of communication channels. We advise to conduct a thorough security audit before giving case access to untrusted parties.
6.4.5. Assigning roles to users
It is important to understand that Roles can be assigned in two ways:
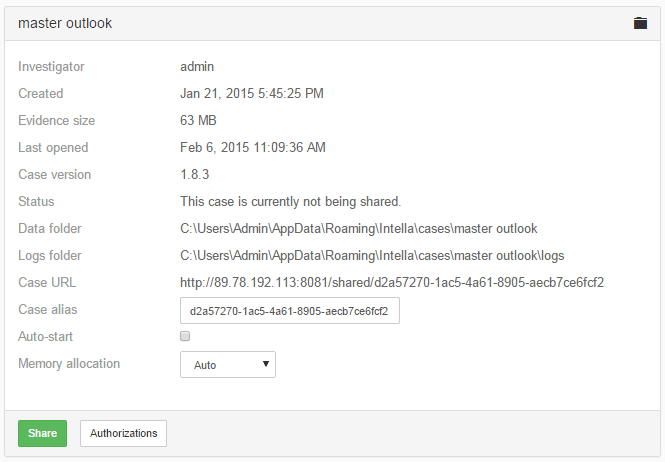
- Roles are assigned to users per case. This means that a user can have different roles in different cases. In Intella Connect each user can have zero, one or many roles assigned to it in any given Case. To assign roles to users per case, click on
Casesin the left side menu in the Intella Connect Dashboard, select a case and then click onAuthorizationsbutton:
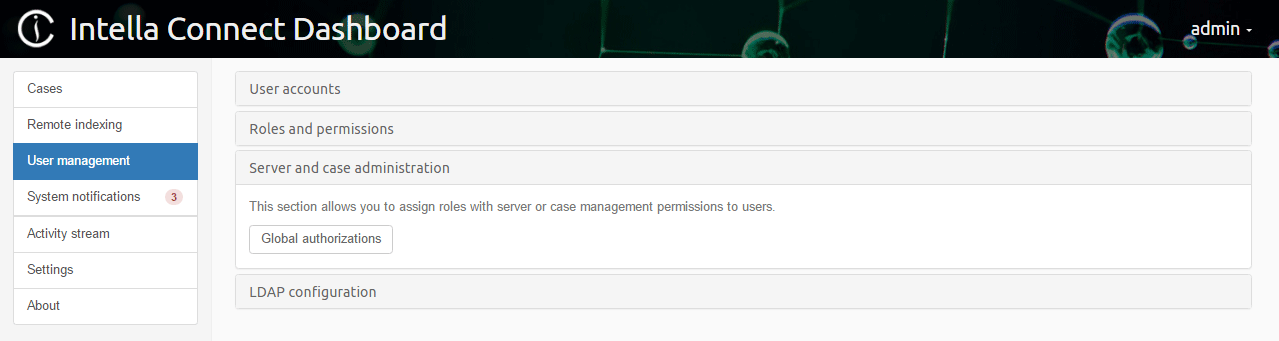
- Roles are assigned to users globally. Only certain permissions can be assigned to users globally and such permissions are related to server or case management. To assign roles to users globally, click on
User managementin the left side menu in the Intella Connect Dashboard,Server and case administrationsection and thenGlobal authorizationsbutton:
6.5. Configuring LDAP providers
It is possible to integrate Intella Connect with an external Lightweight Directory Access Protocol (LDAP) providers. The entire configuration can be done in the User Interface, however this task is not trivial and it requires a good level of knowledge of LDAP schemes.
Important:Configuring LDAP providers is considered an advanced task and should be undertaken only by a well qualified administrators. That is mainly because it impacts how passwords are sent between browsers and the server.
In order to allow Intella Connect to communicate with an LDAP database one must add a so called “provider”. Providers define the connection parameters to your LDAP database, as well as set of user defined queries which will control which LDAP entries can access Intella Connect. You can define as many Providers as you would like, however in most situations having just one would suffice. Any change in the providers list requires a full restart of Intella Connect server for the changes to take effect. It’s also up to the administrator to make sure that having multiple Providers will not result in having any name conflicts (where two accounts share the same username), as in such case results are unspecified.
Important:In order for changes in LDAP providers to take effect you must restart Intella Connect server.
6.5.1. LDAP connection parameters
First four provider settings that you will be asked for are listed below:
- Name: is just a human friendly name that allows to manage providers better. It must be unique and it won’t be editable after you specify it.
- Provider URL: it’s an URL pointing to your LDAP database, ex. ldap://192.168.1.1:10389
- Authentication user DN: it’s a Distinguishable Name (DN) of the LDAP entry that will be used to make searches in your LDAP database. It must have enough privileged to perform LDAP lookups.
- Authentication user password: simply a password for the user listed above
Those settings are essential for the Provider to communicate with an LDAP database.
6.5.2. Username Attribute (UA)
First thing to do next is to choose a so called username attribute (UA). All LDAP providers support “CN” attribute, but it’s not very user friendly to use this one as a username because it’s rather long and hard to remember. Users usually prefer signing in with either their email, or some simple username instead. Feel free to choose any attribute supported by your LDAP provider that uniquely identifies a user.
6.5.3. Customized LDAP queries
The rest of the wizard revolves around creating LDAP queries that specify how to determine which LDAP users should have access to Intella Connect. Those queries are explained below:
- “Username to DN” query:* Some LDAP providers will not return both DN and Username Attribute in the same record. That’s why Intella Connect allows to provide an auxiliary query which does the translation from UA to DN. This query is required even if UA is a part of your standard scheme that defines user record. In this case simply supply a query that returns user record for given username. It’s easy to understand on a working example: we would like users to log in to Connect using unique “email” attribute. We then fetch users from an Organizational Unit (OU) called “groupmembership” which only knows which user entries belong to it based on their DN. So we now must target additional OU called “users” to find what “email” does the given user have.
- “DN to Username” query:* This query is optional and usually won’t be needed with standard OpenLDAP and A.D. implementations. It does exactly the opposite for the previous query. Intella Connect will use it only in case when “All users accounts” query returns user accounts as a multi-value attribute.
- “All users accounts” query: This is a query that should return all LDAP entries that you think should be entitled with an access to Intella Connect. Most probably those LDAP users are a part of some group defined in your schema. Therefore it’s usually enough to supply a query that would return all of users in this group. Depending on how your LDAP is organized, query might return multiple records (each representing single user) or just one record (where users are listed as a multi-value attribute). In the latter case you must provide an attribute name that will be used to pick up users’ DNs.
- “Authentication query:* First two queries allowed us to find which DNs can access Intella Connect and what human friendly username attribute should we use as their identifier. The third query is the most important one, because it will be used to authenticate user against an LDAP directory using credentials filled in on the login screen. You must make sure that this query returns exactly one entry for passed in username.
All of the queries listed above can use special, extended syntax.
6.5.4. Extended syntax
When defining some of the queries you can use standard LDAP syntax with one small extension. When you use special keywords described below, those will be replaced (string replacement) each time with runtime values passed in by the user. In case the value is unknown at the time of query evaluation it will return “NULL” string instead.
- &&USERNAME_ATTRIBUTE&&: this string will be replaced with the name of a username attribute that you defined in Step 3 of the wizard.
- &&USERNAME_VALUE&&: this string will be replaced with the value entered by the user on the Intella Connect login screen.
- &&USER_DN&&: this string will be replaced with the value of user’s DN.
6.5.5. Sample config for OpenLDAP with memberof overlay
Below you will find a sample configuration for a custom database running on OpenLDAP with memberof overlay. It assumes that the user entries are stored in “users” OU and that Intella Connect users belong to a group named “cn=Intella Connect Users Group,ou=groupmembership,dc=vound-software,dc=com”.
Basic settings
- Provider name: OpenLDAP test
- Provider url: ldap://192.168.1.107:10389
- Auth user DN: cn=admin,dc=vound-software,dc=com
- Auth user password: SOME_PASSWORD
Query for getting single user details
- Username attribute name: mail
- Username to DN query Base: ou=users,dc=vound-software,dc=com
- Username to DN query Filter: (&&USERNAME_ATTRIBUTE&&=&&USERNAME_VALUE&&)
Query for getting all user accounts
- Query base DN: ou=users,dc=vound-software,dc=com
- Query filter: (memberOf=cn=Intella Connect Users Group,ou=groupmembership,dc=vound-software,dc=com)
Query for authenticating single user
- Query base DN: ou=users,dc=vound-software,dc=com
- Query filter: (&(&&USERNAME_ATTRIBUTE&&=&&USERNAME_VALUE&&)(memberOf=cn=Intella Connect Users Group,ou=groupmembership,dc=vound-software,dc=com))
6.5.6. Sample config for Active Directory
Basic settings
- Provider name: AD test
- Provider url: ldap://192.168.56.2
- Auth user DN: CN=admin,OU=ConnectUsers,OU=Users,OU=MyBusiness,DC=site,DC=local
- Auth user password: SOME_PASSWORD
Query for getting single user details
- Username attribute name: cn
- Username to DN query Base: OU=ConnectUsers,OU=Users,OU=MyBusiness,DC=site,DC=local
- Username to DN query Filter: (&&USERNAME_ATTRIBUTE&&=&&USERNAME_VALUE&&)
Query for getting all user accounts
- Query base DN: OU=ConnectUsers,OU=Users,OU=MyBusiness,DC=site,DC=local
- Query filter: (objectClass=person)
Query for authenticating single user
- Query base DN: OU=ConnectUsers,OU=Users,OU=MyBusiness,DC=site,DC=local
- Query filter: (&(&&USERNAME_ATTRIBUTE&&=&&USERNAME_VALUE&&)(memberOf=CN=Administrators,CN=Builtin,DC=site,DC=local))