In order to start a reviewing process the first step is visiting a User dashboard. The link and user credentials to access it should be provided by Intella administrator.
After logging in successfully, following screen is shown:

For better user experience it is suggested to change default profile image with custom one as it will be displayed in the Activity Streams, Comments and User Management pages. Default profile image can be changed by clicking on the “change picture” when hovered over the default image. Currently supported image formats are png and jpg. Recommended minimum size of profile image is 128x128. If ratio of uploaded image is other then 1:1 it is cropped like showed on the figure below:
Under the profile image the cases assigned to you are listed. Click on a desired case and provide your credentials to access Intella Connect case reviewing interface.
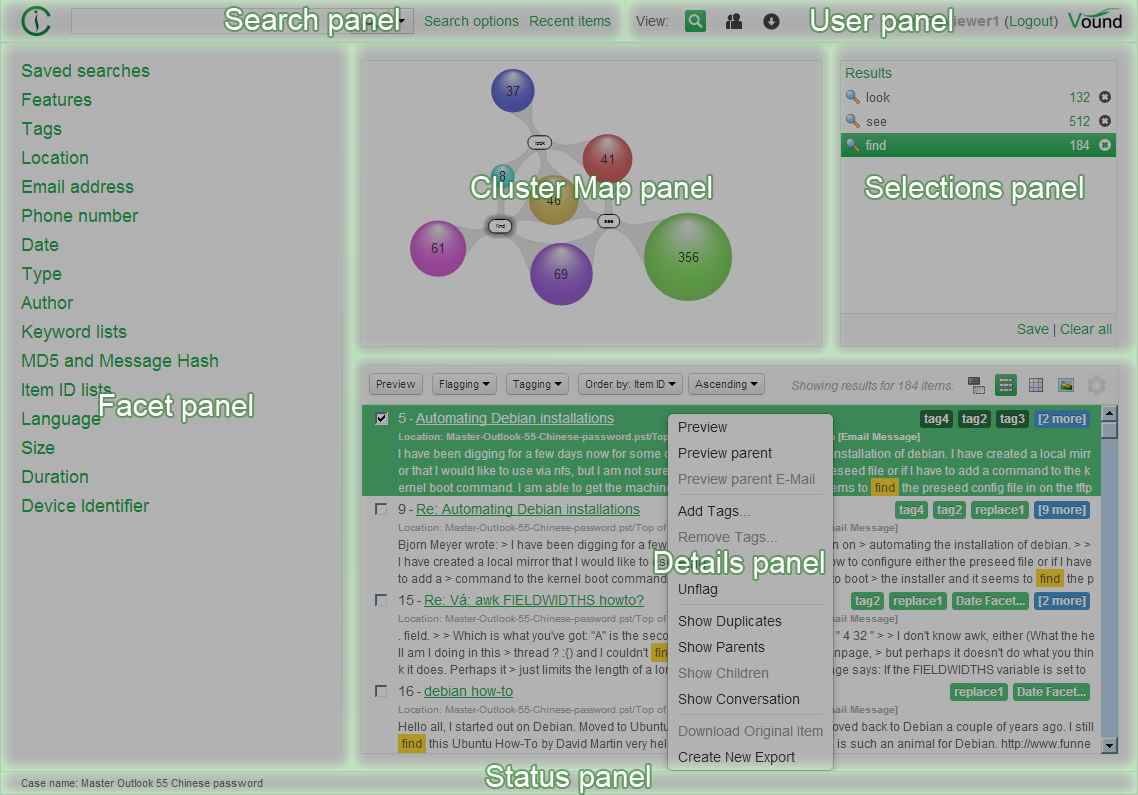
Intella Connect interface consists of following panels:
