7. Details panel
In order to inspect the contents of the visualization, the user can
select a cluster or result set by clicking on it. It’s contents will be
displayed in the Details panel below the map.
This panel contains a list of the items that can be presented in three
modes:
- List view - can be selected by clicking on the list icon.

- Table view - can be selected by clicking on the table icon.

- Thumbnails view - can be selected by clicking on the thumbnails icon.

Actions that can be performed in all three views are:
- De-duplicate the results in the selected view by clicking on the de-duplication icon.

- Double-click on the item to open it up in the previewer.
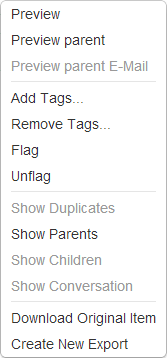
- Right-click on the selected item(s) to show a pop-up window with additional actions.
7.1. List view
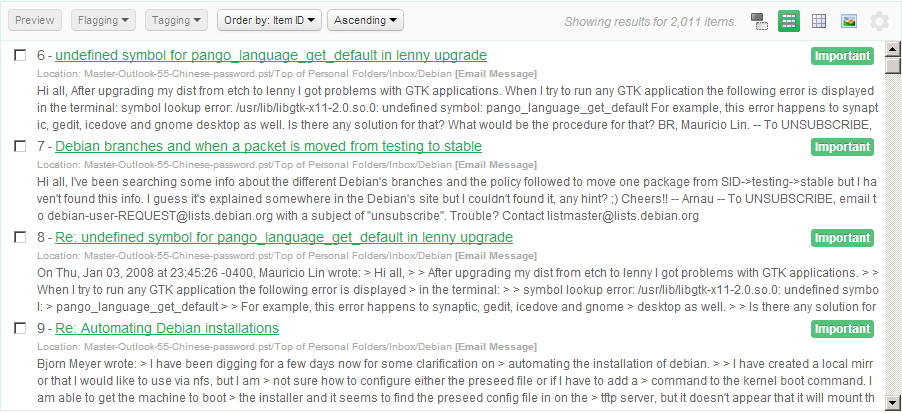
The list view displays the results as a list:
Each row represents a single item:

- In this view a basic information about the item is shown:
- Flagging status.
- ID of an item.
- Title of an item.
- Tags.
- Location of an item.
- Content summary (including hit highlights).
- Actions available in toolbar are:
- Preview - Preview of an item (enabled only when one item is selected).
- Flagging - Add/remove flags of selected items.
- Tagging - Add/remove tags of selected items.
- Order by [item attribute] - Order list by specific item attribute.
- Ascending/Descending - Sort order.

7.2. Table view
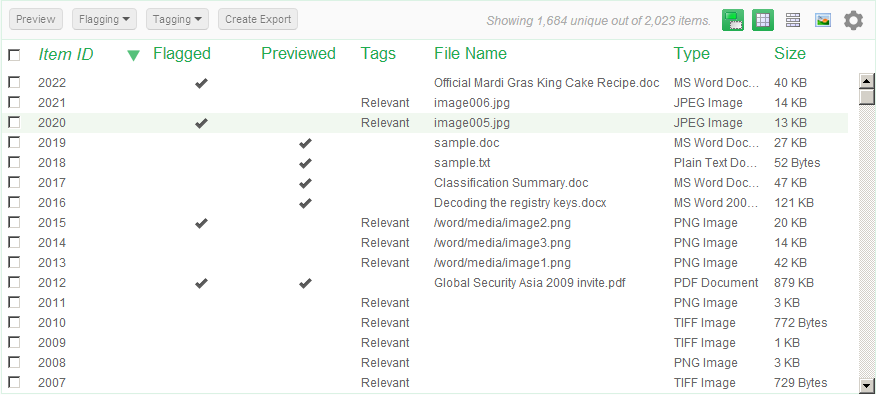
The table view displays the results as a table in which each row
represents a single item and the columns represent the attributes such
as title, date, location etc.
The set of attributes to display can be customized with the settings
button. 
Actions that can be performed in table view are:
- Click on a table column header to sort the table by specific item
attributes.
- The first column is used for items selection.
- Select one item to preview it by clicking on the preview button.

- Select one or more items to flag, tag or export the items.

7.2.1. Adding and removing columns
With the “Toggle visible table columns” button in the Details toolbar you can add and remove columns in the table, by (de)selecting column names in the popup that shows when you click the button. The selected columns are stored: every time you start Intella, these columns will be shown until you select other columns.
This option is only available in the Table view. The following columns are available:
General columns:
- Contact name: The name of a contact encountered in a PST file or as a vCard file.
- Decrypted: Shows if an item is encrypted and Intella was able to decrypt it.
- Duplicates: Shows the number of duplicates of an item within the case.
- Encrypted: Shows if an item is encrypted.
- Exception: Shows if an item had one or more issues indexing properly.
- File Name: The name of a file in the file system, in an archive or used as an attachment name.
- Item ID: The ID used internally in Intella’s database to refer to this item.
- Language: The language of the item’s text. The language field is left blank when the language cannot be detected automatically. When the language could not be determined, e.g. because the text is too short or mixes various languages, the value shown will be “unidentified”. Item types that inherently do not have a language, e.g. images or archives, show the “not applicable” value.
- Location: Name of the location in the original evidence data where the item is stored. For example, an email in a PST file would have a location that would start with the folder and file name of the PST file, followed by the mail folder path inside that PST file.
- MIME type: The type of an item according to the MIME standard.
- Size: The item’s size in bytes.
- Source: The name of the Intella source that holds the item. Typically this is the root folder name or the name of the mail container file (e.g. PST or NSF file).
- Source Path: The path to the evidence, e.g. the PST or NSF file, or the root folder of a Folder source. This helps reviewing items when dealing with a lot of evidence files – the name of the evidence file and the derived source name may not hold enough information to easily discern the origin of the information.
- Subject: The subject of an email or document item – note that some document formats can have both a title and a subject.
- Title: The title of a document item.
- Type: The item’s human-readable type, e.g. “MS PowerPoint Document” or “Email Message.”
- URI: Uniform Resource Identifier, the identifier used internally by Intella for the item in addition to the Item ID.
Email-specific columns:
- Attachments: Shows the file names of an email’s attachments.
- Has Attachments: Emails that are marked as having attachments.
- Has Internet Headers: Emails that did not have regular SMTP headers. Still information about e.g. sender, receiver and dates may be obtained from other fields, depending on the source format.
- Message Hash: Shows the Message Hash for email messages. This hash is used for deduplicate emails in a manner that works across different mail formats.
- Message ID: Shows the Message ID extracted from email messages.
- Receiver: The name and email address of the receiver(s) of an email item.
- Sender: The name and email address of the sender(s) of an email item.
- Unread: Shows if an email item was unread at the time of indexing.
Cellphone-specific columns:
- All Phone Numbers: phone numbers relevant to a phone call, regardless of whether it is an incoming or outgoing call, combined with phone numbers found in contacts.
- Incoming Phone Numbers: phone numbers used for incoming phone calls.
- IMEI: The International Mobile Station Equipment Identity (IMEI) number of the phone from which the item was obtained.
- IMSI: The International Mobile Subscriber Identity (IMSI) associated with the item.
- Outgoing Phone Numbers: phone numbers used for outgoing phone calls.
- Duration: how long the phone call took.
File- and document-specific columns:
- Contributor: The name(s) of the contributor(s) of a document. These are typically authors that edited exiting documents.
- Creator: The name(s) of the creator(s) of a document item. These are typically the initial authors of a document.
- Empty document: Shows that the item has no text while text was expected. Example: a PDF file that contains only images.
- MD5 Hash: The MD5 hash that uniquely identifies the item.
Columns containing dates:
- Called: The date a phone call was made.
- Content Created: The date that the content was created, according to the document metadata.
- Content Last Modified: The date that the content of the item was last modified, according to the document-internal last modified date.
- Due Date: The due date of a task.
- End Date: The end date of an appointment, task or journal item.
- File Created: The date a file was made, according to the file system.
- File Last Accessed: The date a file was last accessed, according to the file system.
- File Last Modified: The date of the last time the file was modified, according to the file system.
- Last Printed: The date a document was last printed, according to the document-internal metadata.
- Received: The date the item was received.
- Sent: The date the item was sent.
- Start Date: the start date of an appointment, task or journal item.
Review-specific columns:
- Comments: Shows if an item has comments. When this is the case, a yellow note icon is shown in the table. Hover over the icon to see a tooltip with the comments attached to the item.
- Exported: Shows if an item has been exported.
- Flagged: Shows a column at the left side of the table that indicates if an item is flagged. Click the checkbox if you want to flag an item.
- Opened: Shows if an item has been opened in its native application.
- Previewed: Shows if an item has been opened in the previewer.
- Tags: Shows the tags connected to an item.
For contacts, e.g. email senders and receivers, this popup lets the user choose whether to display the contact name, the email address or both. The chosen setting will affect the table sorting when the involved columns are used to sort the table.
Use the “Check / uncheck all” checkbox to immediately set all checkboxes on or off.
7.3. Thumbnails view
The Thumbnails view displays the thumbnails of the images detected
within a selected cluster. This includes images embedded in e-mail
attachments and images inside documents.
Actions that can be performed in thumbnails view are:
- Hover over the thumbnails with your mouse cursor to see a summary of
the data connected to the image.
- You can flag an image with the checkbox below the thumbnail.
- When you double-click a thumbnail, the image will open in the
previewer.