3. Getting started
Important
Same requirements, suggestions and security considerations that apply for Intella Connect, apply also for Intella Node product.
3.1. Who should be involved in the successful setup of Intella Connect?
While setting up Intella Connect is very straightforward, it does require a sound experience with network and computer configuration. Further to this, the person setting up Intella Connect will often need to enlist the experience, permissions (user credentials) and sign-off of a number of other specialists to complete a successful installation.
Intella Connect is a web server and as such requires that a successful setup takes the following into account:
- The security of data and any policies your organization may have for transmitting data across a network.
- The configuration of the base operating system used for Intella Connect.
- The configuration of firewalls on the host operating system.
- The configuration of security software such as anti-virus programs.
- Any firewall(s) between the Reviewer and the Intella Connect server.
- If Intella Node is used, any firewall(s) between the Intella Node server and the Intella Connect server.
- Configuration and access to any secure networking protocols such as VPN’s or other network-based encryption methods.
- The storage locations for evidence and case folders.
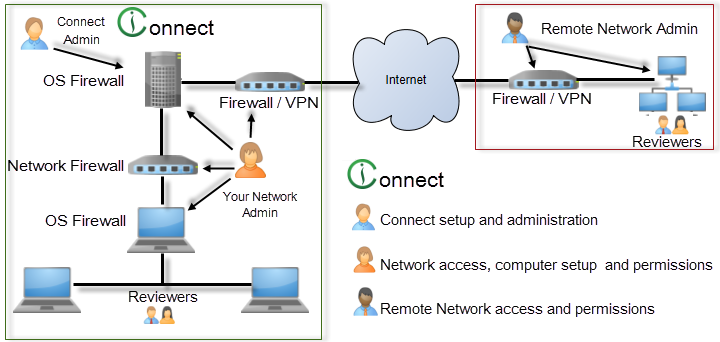
The image above shows a simplistic Intella Connect environment.
With this in mind, Vound suggests that the following user types are involved in the planning and installation of Intella Connect:
The Connect Admin - The person who will manage Intella Connect. They should have a detailed understanding of case management, e.g. be able to manage the administration of adding new cases and assigning reviewers to Intella Connect.
Your Network Admin – Your network administrator will be crucial in the setup of Intella Connect. He or she will have experience in setting up a web service on a server and will be able to guide the Intella Connect Administrator on the best and most secure configuration methods to do so.
They will need to have the user credentials and knowledge to:
- configure and manage the Standard Operating Environment (SOE) of both the Intella Connect server and Reviewers computers.
- advise on the port that Intella Connect uses to ensure that there are no conflicts with other applications.
- advise on the best ports to share cases on and to ensure that there are no conflicts with other network traffic.
- set the configuration of the server, firewalls and VPN to allow Intella Connect to share cases using the chosen port and networks.
An experienced network administrator should be able to install Intella Connect in 1-2 hours. However, this will take much longer if a detailed plan of what tasks need to be done prior to sharing a case is not undertaken.
Note
Failing to involve a competent network administrator is a mistake. It can lead to an insecure setup or cause network issues that can affect all other network users. It may even see you breach company policies on the transfer of data between networks.
What if you don’t have a network administrator? It is expected that you will have a good knowledge of Windows, networks and firewalls prior to installing Intella Connect. Please understand that Vound cannot offer support for these topics as they are the prerequisites for running a web service.
The Remote Network Admin – If you are planning to share a case over the Internet, you will need to have your network administrator work with the remote network administrator to enable secure case sharing. The remote network administrator will most likely have the same responsibilities as your network administrator and be best placed to ensure success.
In summary
Installing Intella Connect will involve more knowledge and experience than installing other Vound products. If you have not installed a web service or configured a fire wall before, you should seek help from a qualified network administrator prior to doing so. At all times, security and stability should be your goal.
3.1.1. Assumptions
This section makes the following assumptions:
- The computer or server used is solely for Intella Connect.
- The network used is a LAN and not subject to any firewalls other that the on the client or server.
- The settings given below are validated as secure and allowed by the organization.
- The user will consult their network administrator for configuration options should they wish to share a case via the internet.
- Any other security software will be disabled during setup.
3.1.2. Operating Systems
Intella Connect can be installed on the following operating systems:
- Vista
- Windows 7
- Windows 8
- Windows 10
- Windows Server 2008
- Windows Server 2008R2
- Windows Server 2012
- Windows Server 2012R2.
Although Intella Connect can be installed on a number of Windows Server Operating Systems, Intella Connect does not require a Windows Server OS and runs perfectly well on one of the mentioned desktop operating systems in most circumstances. Note that server hosted installations of Intella Connect are only supported if configured according to the specifications contained within this User Manual.
Note
We do not recommend installing Intella Connect on Home editions of Microsoft Windows.
3.1.3. Potential Conflicts
- Certain anti-virus software, specifically AVG, have prevented or interfered with the installation of Intella Connect. Therefore it is recommended that you disable any anti-virus software before installing Intella Connect.
- We do not support the installation of Intella Connect on a Server OS that already has IIS configured for web hosting.
3.2. Installing and starting Intella Connect/Node
Note
There is one installer that can be used to install Intella Connect and/or Intella Node.
- Download Intella Connect through the Downloads page on the Vound support website: http://support.vound-software.com/
- Double-click on the downloaded
.exefile to launch the installer. Accept the license. - Choose the product you wish to install.
- Enter the location to store the application files and shortcuts or accept the default installation path.
Important
Intella Connect/Node will not install in an installation folder of an earlier version. Install a new version of
Intella Connect/Node in a folder with a new name, for example: C:\Program Files\Vound\Intella Connect 2.2\
/ C:\Program Files\Vound\Intella Node 2.2\. It is possible to install multiple Intella Connect/Node versions
side by side when they are installed as standalone program (not as a Windows services) - but there should be only
one Intella Connect/Node as a service installed at any point in time. It is possible to install Intella Connect
and Intella Node on the same computer, since they are using different program file locations such as shown in example above
(read more)
If Intella Connect/Node should be installed as Windows Service, follow one of the following sections based on the product you are installing:
- Installing and starting Intella Connect as a Windows Service
- Installing and starting Intella Node as a Windows Service
otherwise uncheck the checkbox labeled “Install as a Windows Service”.
All files will be extracted to the location of your choosing and an Intella Connect/Node shortcut is (optionally) placed on your desktop and in your Start menu.
User folder
%USER_HOME%\AppData\Roaming\Intella Connectwill be created. It contains Intella Connect/Node related settings, files and data.
3.2.1. Installation of Intella Connect and Intella Node on the same machine
It’s important to understand that remote indexing feature available in Intella Connect was designed in a way which promotes installing instances of Intella Connect/Node on separate servers. The reasons are outlined below:
- improved scalability - adding more processing power can be as simple as adding new machines to the network and installing Intella Node on them
- improved fault tolerance - if unexpected events will cause one instance of Intella Node to go down, then one has higher chances that processing and reviewing of other cases will be unaffected
- faster troubleshooting - maintaining independent systems is much easier and speeds up potential error analysis and recovery
We suggest to take this into consideration when designing new systems and adjusting existing ones if feasible.
Important
We do not recommend installing Intella Connect and Intella Node on the same server.
Note
Instances of Intella Connect and Intella Node are reusing the same configuration files. This should be accounted for during installation, backups or migration.
That being said, it might make sense to do this when setting up testing environment or when using cutting-edge servers. In such cases a highly qualified IT personnel should make a risk-to-reward assessment.
3.2.2. Changing a default port
Before starting Intella Connect/Node for the first time you may want to change the default port (9999) Intella Connect/Node is running on.
To change default port of Intella Connect or Intella Node please look for user.prefs file located in:
%USER_HOME%\AppData\Roaming\Intella Connect\prefs
then open it with a text editor and find ServerPort or NodePort property respectively.
Note
If ServerPort/NodePort property is missing, just create one with the desired port value.
For Intella Connect You should change it to desired port like:
ServerPort=8080
to run on port 8080.
For Intella Node You should change it to desired port like:
NodePort=8080
to run on port 8080.
Important
If Intella Connect/Node is already running when port is changed, it will have to be re-started for changes to take effect.
If Intella Connect and Intella Node will be running on the same computer, then they cannot have the same port (read more:).
How to choose the best port for Intella Connect/Node:
If you do not wish to use port 9999 for Intella Connect/Node you may select a port of your choosing. One option is to use port 80, a common port that is usually open in the firewall for at least outbound connections already. Using port 80 removes the need to add a port to the Case URL when typing it into a web browser as well. Like all ports, port 80 must not be presently occupied. If you wish to choose another port, you can select one from 1…65535 although it is best to choose a port greater than 1023 as those 1…1023 are registered ports and may be in use already. No matter what port you select, you should confirm whether or not it is in use on the host already.
3.2.3. Local Firewall Configurations
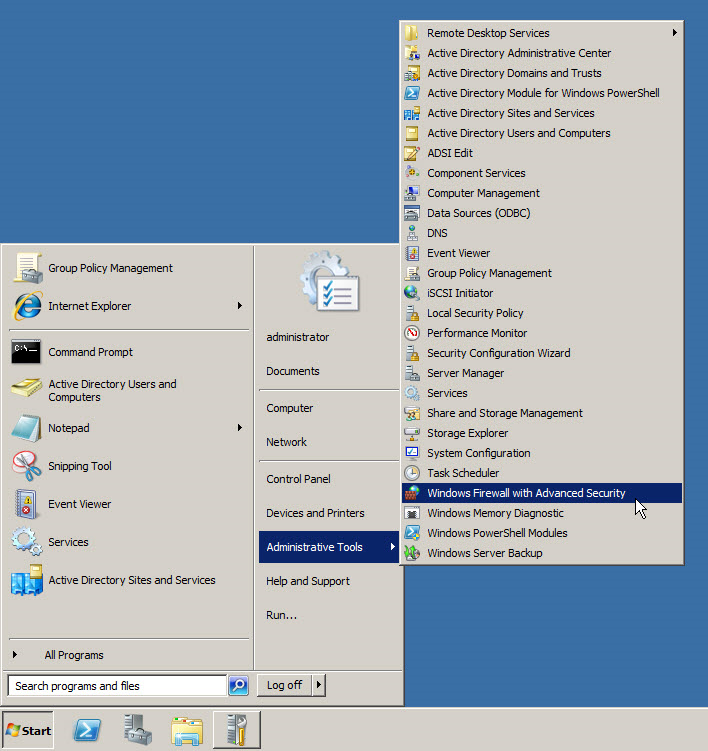
Intella Connect uses port 9999 (you can also assign a different port of your choosing as described in changing a default port). This port must be open on the local firewall in order for Intella Connect/Node to work correctly. To configure the local firewall for Server 2008 R2, go to Start – Administrator Tools – Windows Firewall with Advanced Security.
To enable or disable the Windows Local Firewall, click on Windows Firewall Properties.
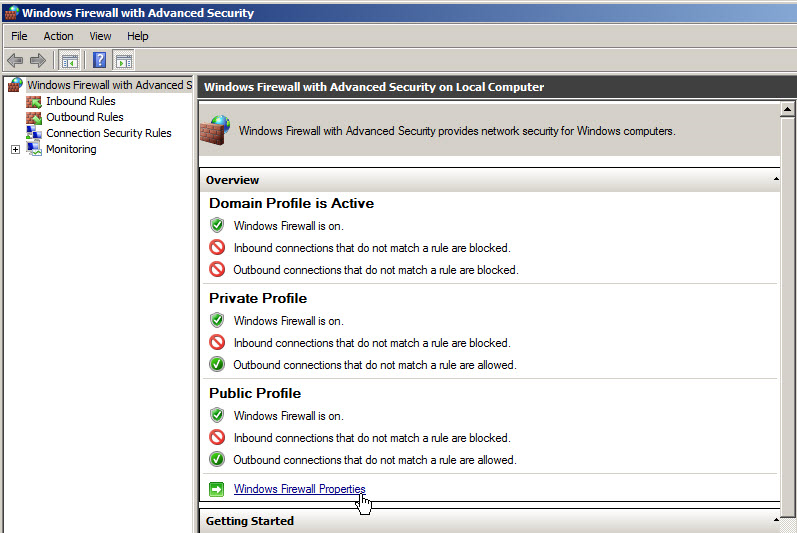
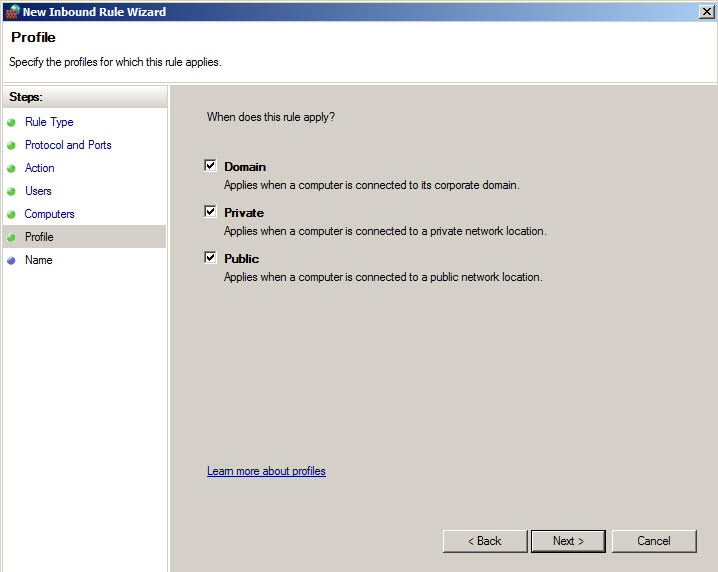
There are three separate profiles contained within the Windows Firewall. They are:
- Domain - Applied to a network adapter when it is connected to a network on which it can detect a domain controller of the domain to which the computer is joined.
- Private - Applied to a network adapter when it is connected to a network that is identified by the user or administrator as a private network such a home network.
- Applied to a network adapter when it is connected to a public network such as those available in airports and coffee shops. When the profile is not set to Domain or Private, the default profile is Public.
Select the Profile you want to configure and select On or Off. If the firewall is turned on you may select either Block (default), Block all connections or Allow for Inbound Connections. You may select Allow (default) or Block for Outgoing connections.

- Intella Connect
- For the Intella Connect server, the host in which you share the case, you must configure the firewall for inbound connections.
- For the client, the host in which you will review the case, you must configure the firewall for inbound connections.
- Intella Node
- For the Intella Node server, the host where indexing will be performed, you must configure the firewall for inbound connections.
- For the Intella Connect, the host which will communicate with the Intella Node, you must configure the firewall for inbound connections.
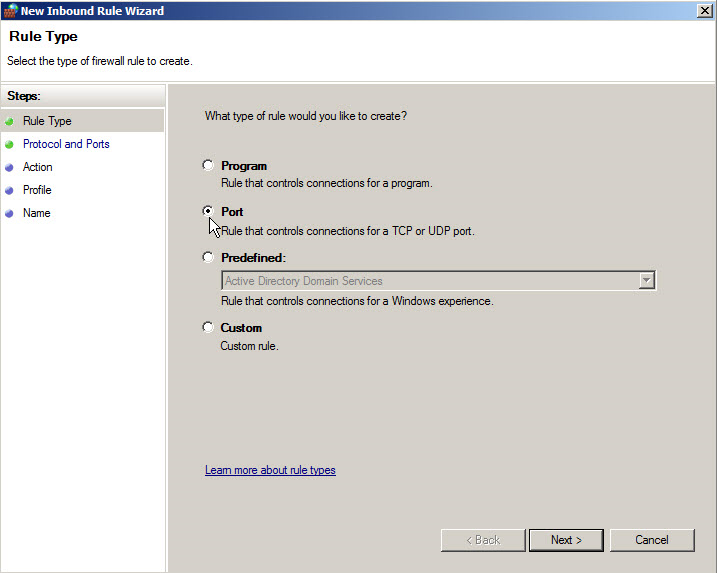
Although you can configure the firewall at large, in most situations you probably just want to configure the firewall for the Intella Connect/Node designated port only. To do so, right click either Inbound or Outbound Rules and select “New Rule”.
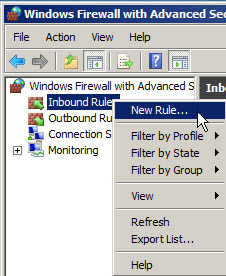
In the New Rule Wizard, select Port.
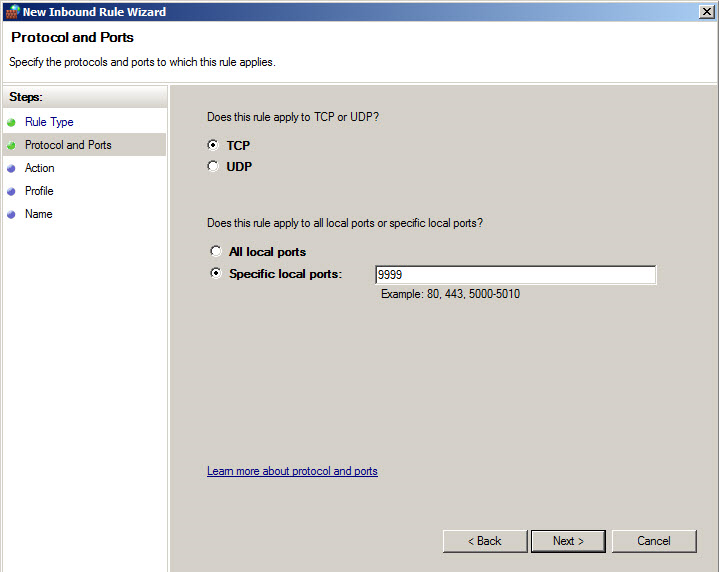
Select TCP as the Protocol and 9999 as the Port or the port you have chosen as described in changing a default port.
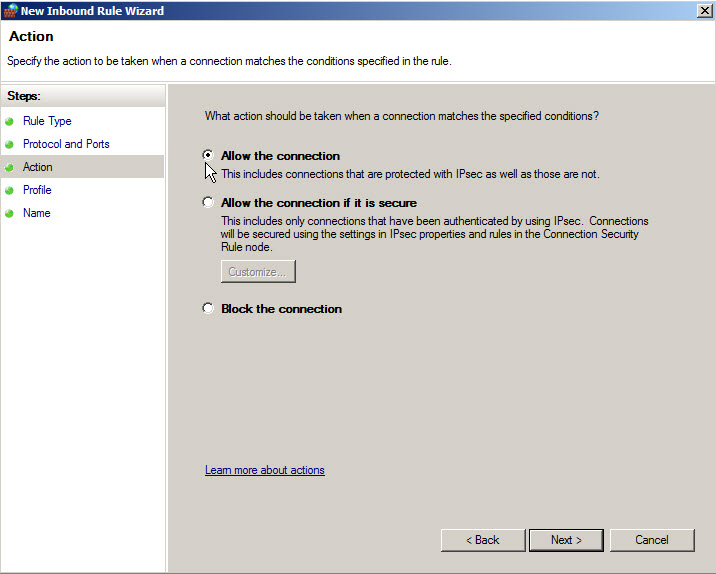
Select “Allow the connection”.
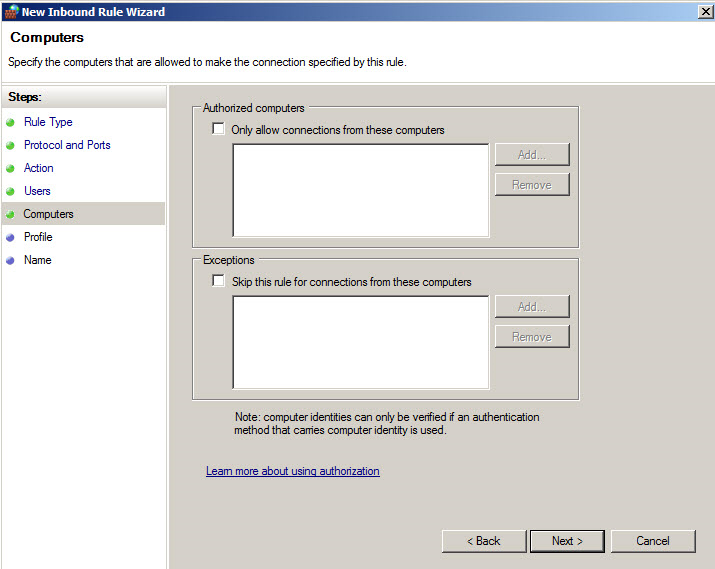
If you wish to designate only designated users to this port, you may select those users in “Authorized Users”.
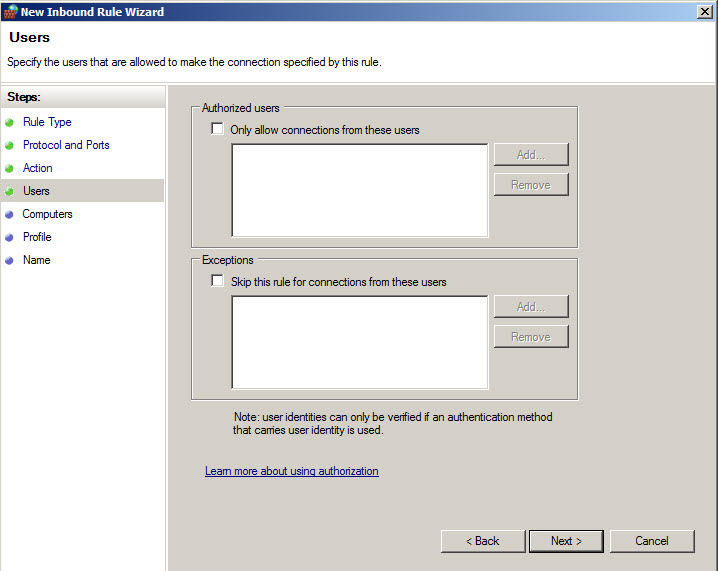
You can also select designated computers as well.
Then select the profile you wish to use.
Finally, name the Rule appropriately.
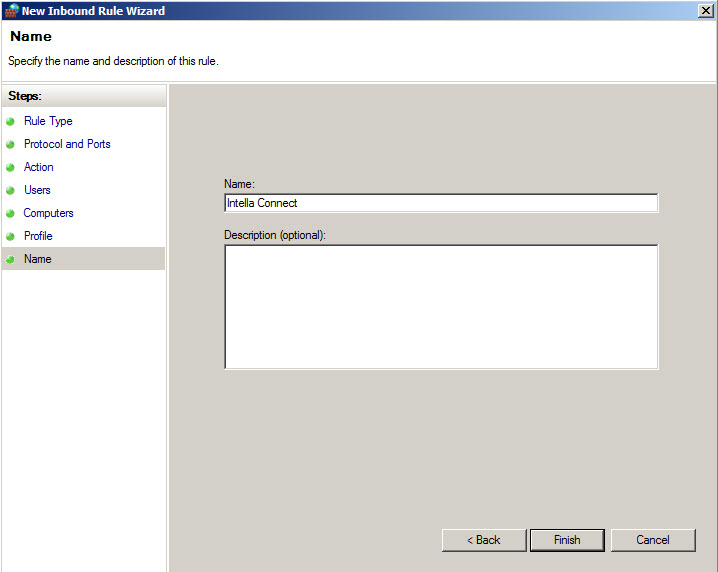
The Rule will now appear in the list of rules.

To access the Windows Firewall in Server 2012, click on the Server Manager icon in the task bar.

Then select Local Server in the left hand menu.
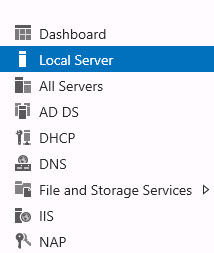
Then select Windows Firewall and Advanced Security from the Tools menu in the right hand corner.

The procedure to configure the Windows Firewall is identical to that of Server 2008 R2. You can also access the Windows Firewall through Control Panel just like any of the Windows Workstation operating systems.
3.2.4. Starting Intella Connect/Node
The application folder contains an executable called IntellaConnect.exe or IntellaNode.exe in
case of Intella Connect or Intella Node respectively that can be used to launch the application.
The desktop and menu shortcuts also start this executable.
To start Intella Connect/Intella Node, double-click on the Intella Connect/Intella Node icon on the Desktop or select Intella Connect/Intella Node from the Start menu.
Note
If you click on this icon more than one time, you will receive the following error:
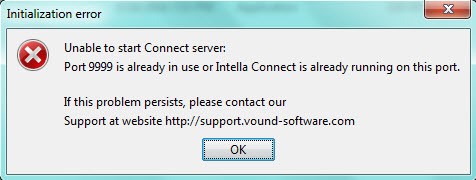
This is because only one instance of Intella can run at a time.
If you are receiving this error after starting Intella Connect/Node for the first time, please look at section troubleshooting port conflicts.
Note
No splash screen or window will be shown when you start Intella Connect/Node. Instead, an Intella Connect/Node icon will show in the Windows system tray.
Based on the application proceed with those steps:
- Intella Node - Locate the green Intella Connect logo in the system tray and double-click on it. This will open Intella Node local status page. If message saying “The Intella Node is prepared now” is present the installation of Intella Node was successful. You can proceed with Case Templates section in order to make use of newly installed Intella Node by Intella Connect.
- Intella Connect - Please proceed with reading the rest of this section.
![]()
Locate the green Intella Connect logo in the system tray and either:
- double-click on the icon, or
- right-click on the icon and select the Admin Dashboard menu entry.
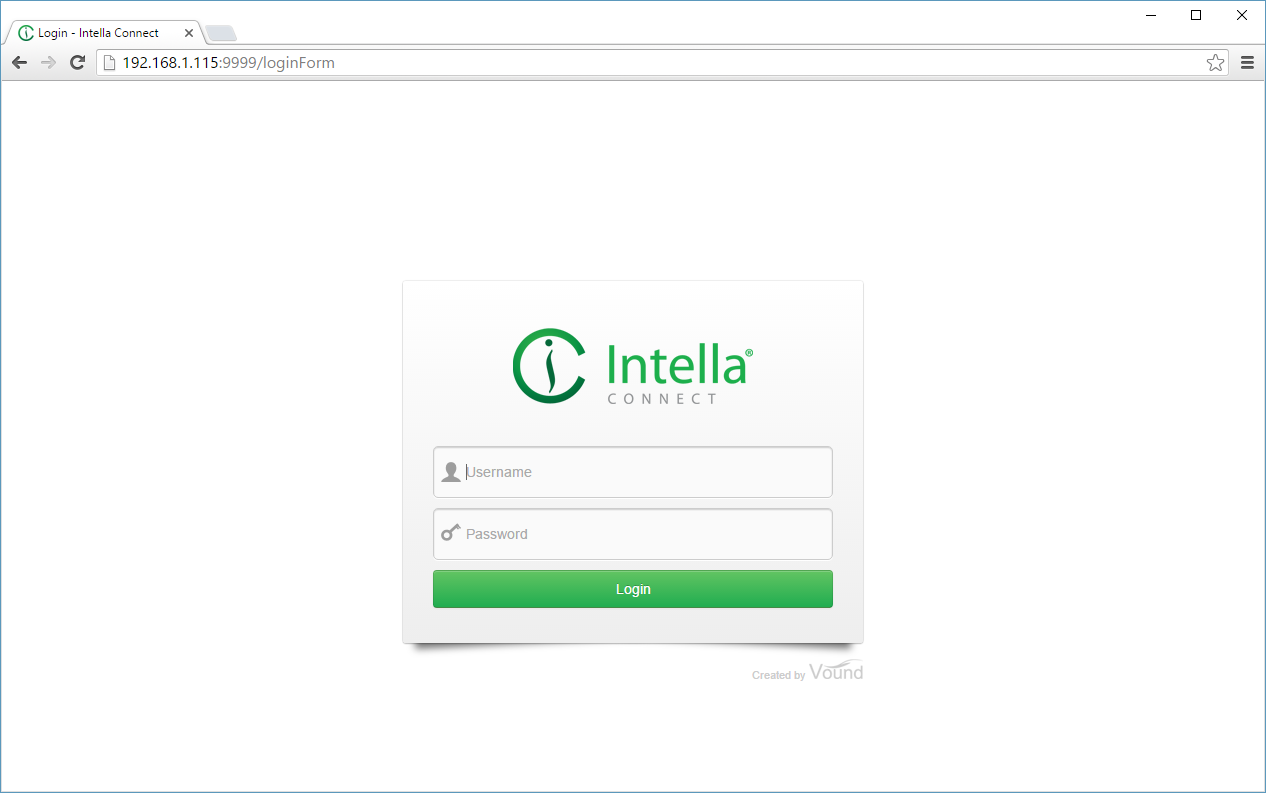
This will open the Intella Connect Dashboard in your web browser. When
requested for a user account, enter admin as username and admin
as password. These are the default values. How to change the admin password is
explained in the User management section.
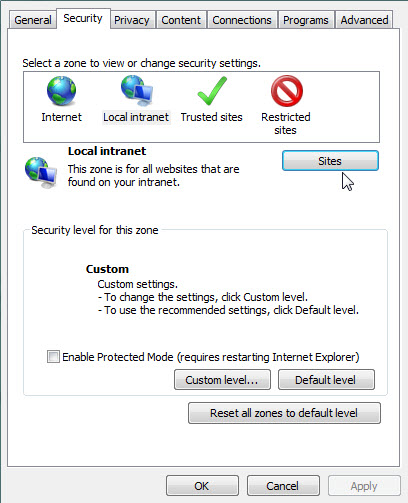
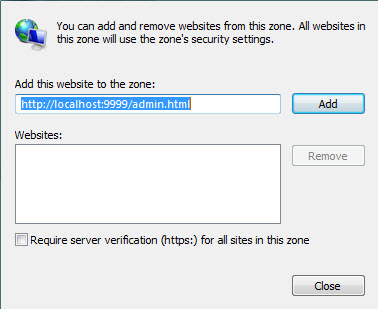
If using Internet Explorer, you may see this popup message below.

This popup indicates that your computer doesn’t recognize that you are on the Intranet. To correct this simply go to Internet Options. Click the Security Tab and then select Local intranet Sites.
You can then select “Automatically detect intranet network” and all Intranet sites will be recognized.
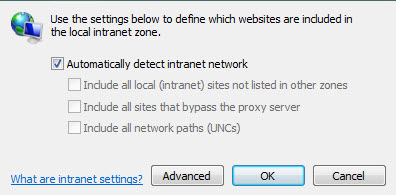
You can also click “Advanced” and insert the address of the Intella Connect site URL as is shown below.
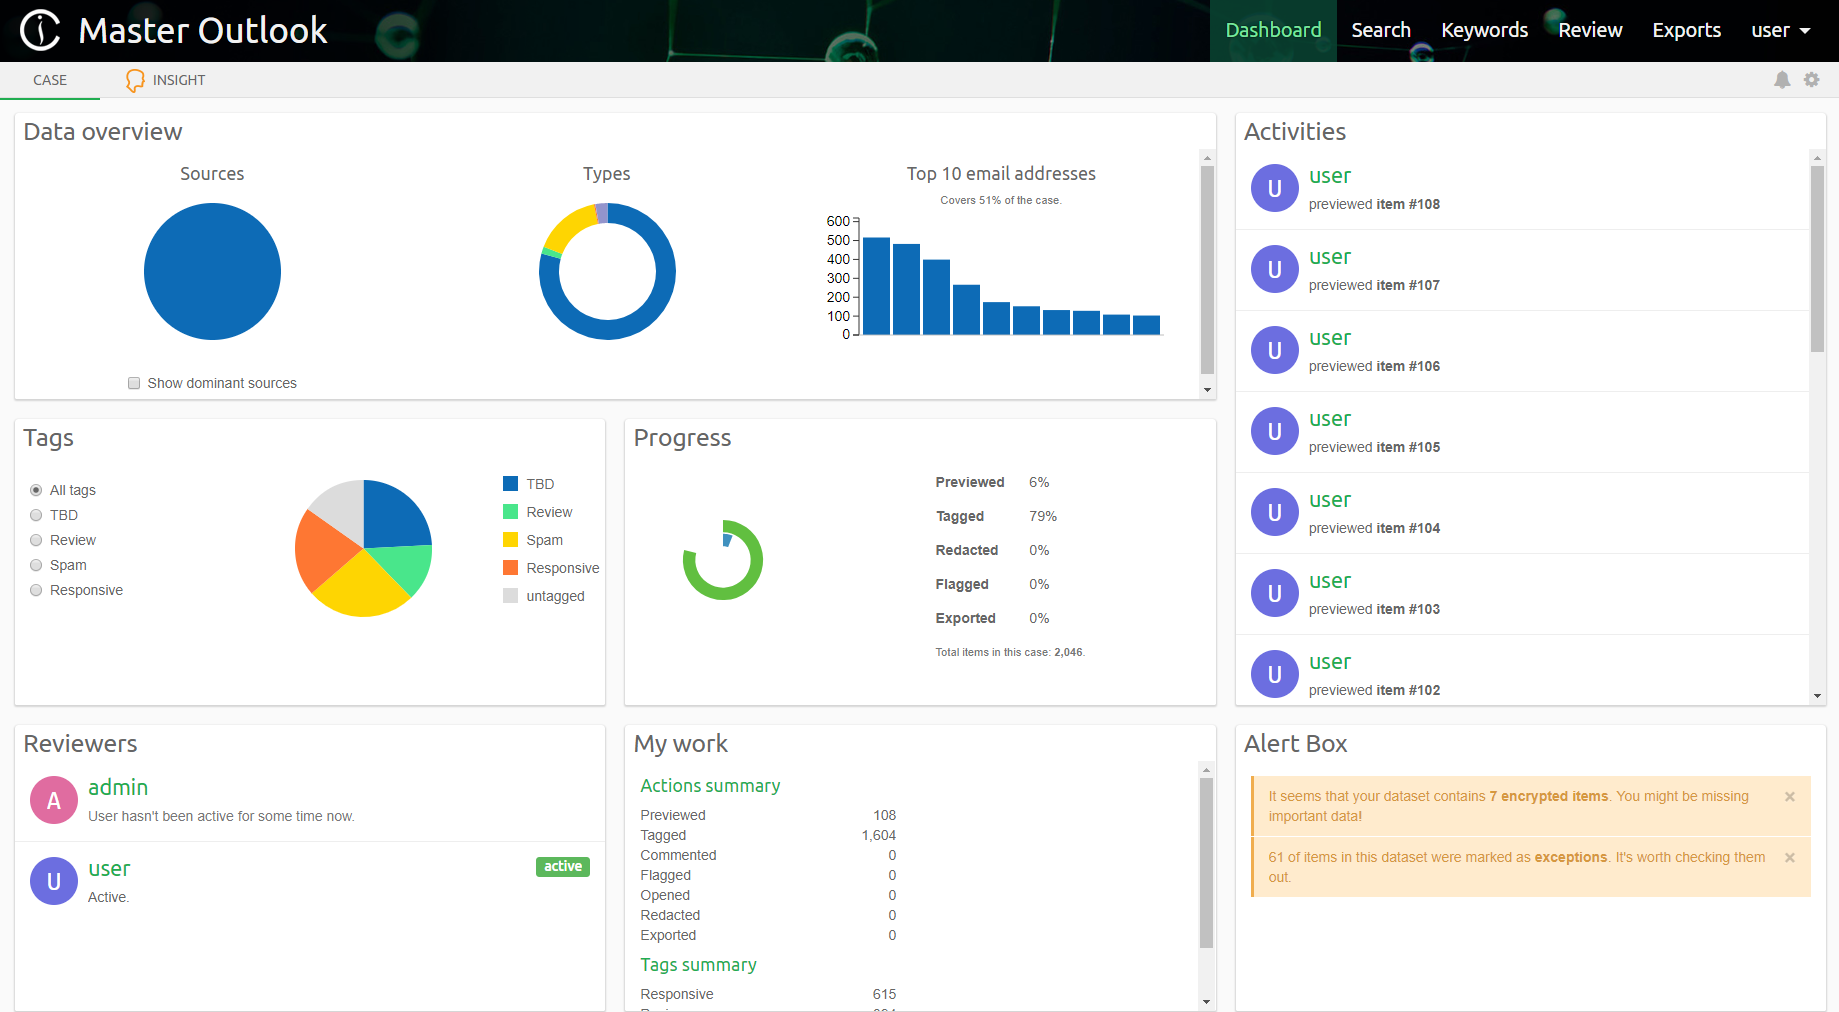
- The Dashboard will show cases:
- created using Intella Connect and indexed by Intella Node
- created with the desktop-based Intella version (Intella 10, Intella 100, Intella 250, Intella Professional or Intella TEAM Manager) on the same computer where Intella Connect is running.
If you have not created any cases yet, you can do so in the Intella Case Manager. For more information, please refer to the section called “Creating a new case” in the Intella User Manual.
If you already have cases created, but they are located on different computers than the one on which Intella Connect is running, you can choose to do one of the following:
- Copy the case folder to the computer on which Intella Connect is running and add an existing case, as described in the section called “Opening an existing case not in the list” in the Intella User Manual.
- Export the case as described in the section called “Opening an existing case not in the list” in the Intella User Manual and import the case on the computer on which Intella Connect is running, as described in the section called “Importing a case”.
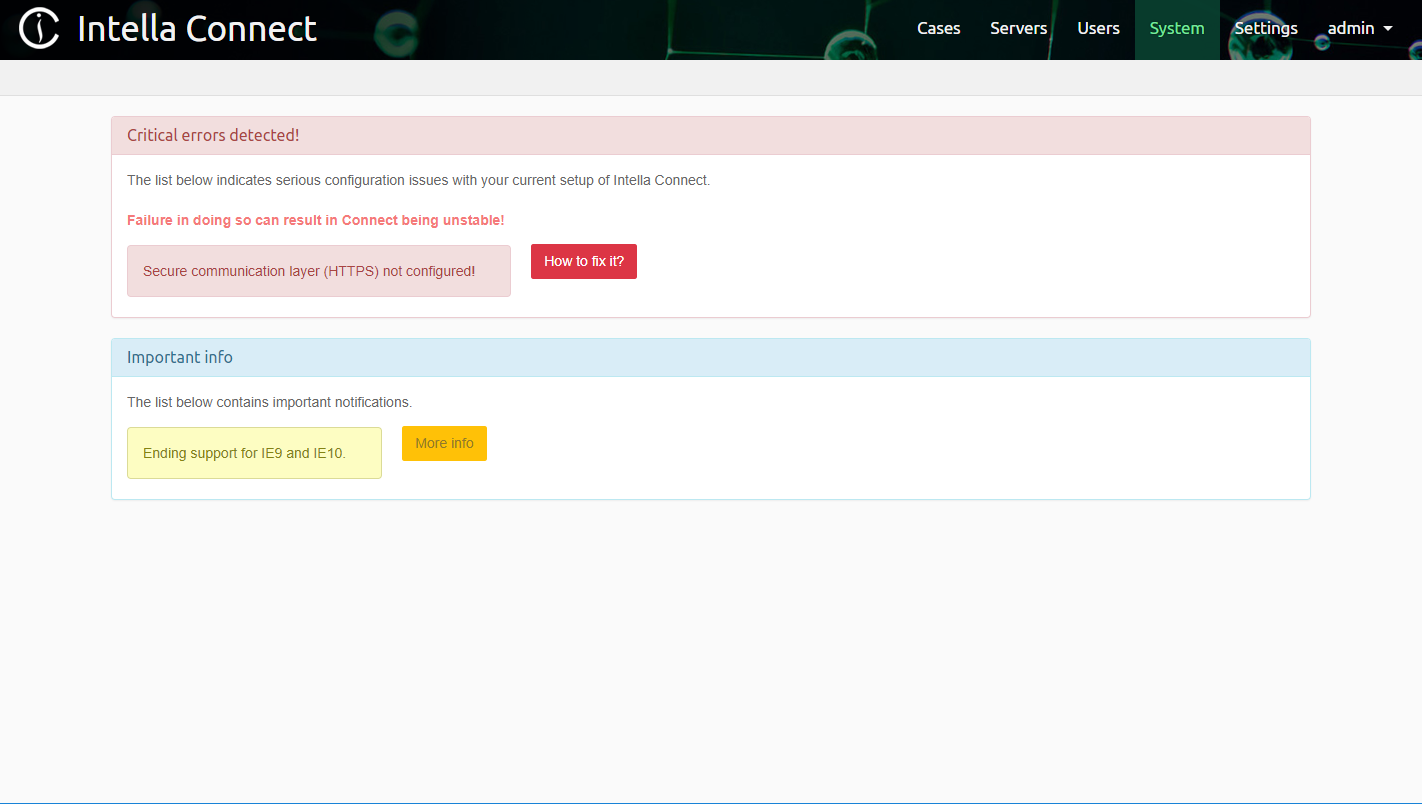
It is recommended to go to the Admin Dashboard and select Systems Notifications which will inform you of any critical alerts or potential issues.
3.3. Licenses and dongles
Notes on the trial license that is bundled with the software that you have downloaded:
- 2-Day evaluation period.
The trial version runs under a HASP Software License, which gives you the ability to use Intella Connect for 2 days. The 2 days evaluation period cannot be extended. The only way to continue using Intella Connect is to purchase a dongle.

- Continue working with a USB dongle.
If you would like to continue using Intella Connect after this 2 day period, you will need to buy a license. After buying the license you will receive a USB dongle that will allow you to continue using the version you already installed. A dongle provides a perpetual license.
- System clock.
Changing the clock on your system will cause the trial to automatically expire. When this occurs, the only way to continue using Intella Connect will be to purchase a license.
- Virtual Machines, VMware.
The evaluation version will not work in VMware without a dongle.
- RDP (Remote Desktop Protocol) connection.
When using RDP, the dongle or trial license must be in/on the computer running the Intella Connect, not in the computer running the RDP viewer.
- Other dongle-protected software must be closed
All other HASP protected software, like EnCase (Guidance), Smart Mount (ASR Data), HBGary and i2 products, must be closed when installing Intella Connect.
3.4. Sharing a Case
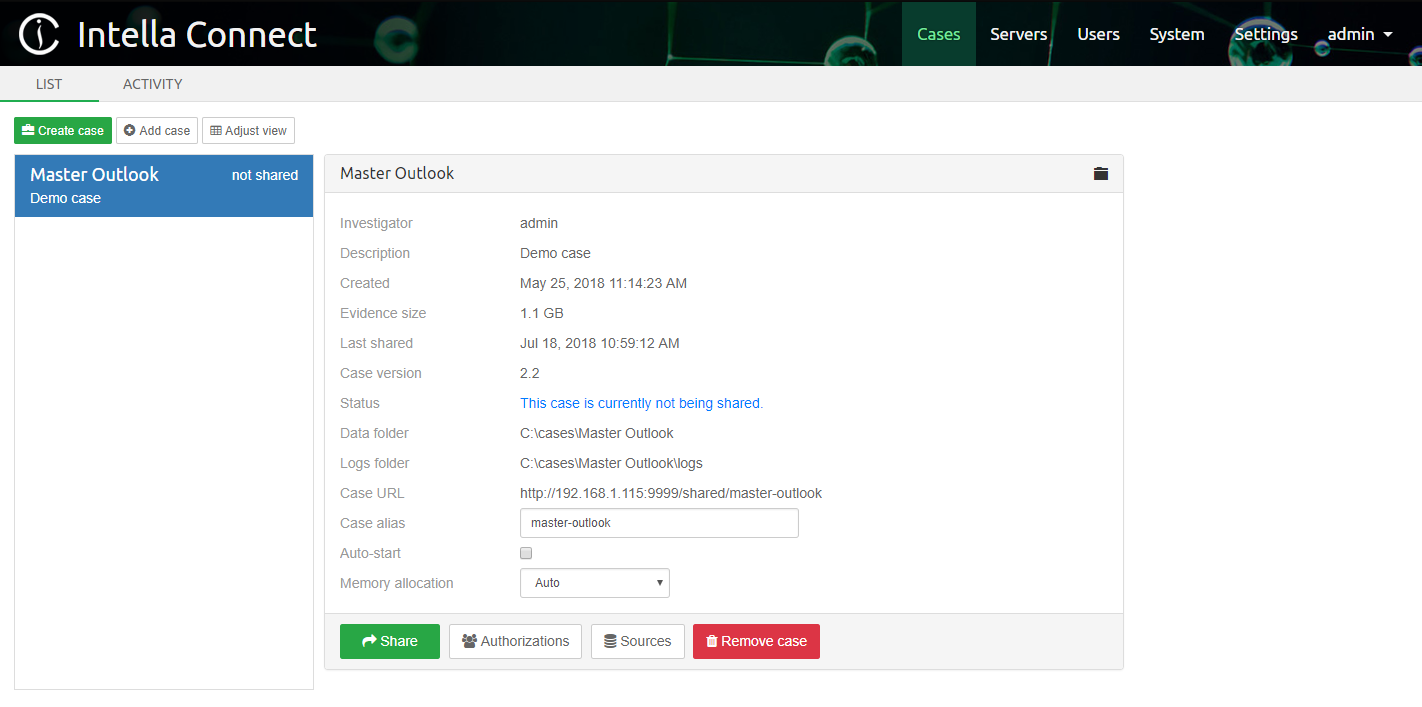
Select the case you wish to share by clicking on the case name in the Dashboard. This will show the case details on the right side of the page and allow you to access the settings and share function for that case.
It’s possible to change case URL by changing Case alias field present in case details section.
Note
Only alphanumeric characters and hyphen can be used when specifying Case alias.
How to define the users that will be able to access shared cases is explained in the User management section.
Once complete, click Share.
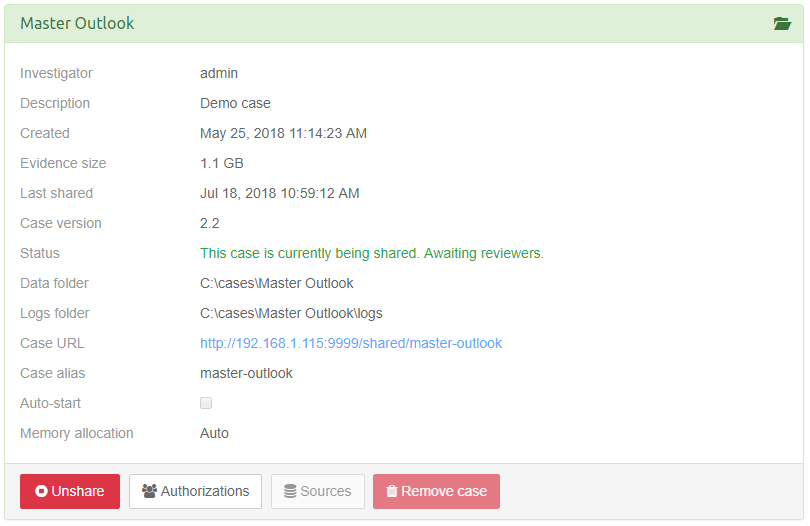
The image above shows the case having been shared. Note the location of the case address and port, shown as a blue hyperlink.
Note
When you are sharing a case with Intella TEAM Manager or have it opened locally, you will not be able to share it with Intella Connect at the same time. Only one application can use a case at a time.
Note
If for some reason case will not open, try refreshing your browser by pressing the F5 button. If that does not help, please try to re-enter the case URL into the browser’s address bar.
3.4.1. Granting case access to users
Before or after a case has been shared, you can define which users can access it. By default no user can connect to a shared case.
To allow users to participate in a review you can click on the Authorizations button. This will open a modal window where
you can assign users to various roles.
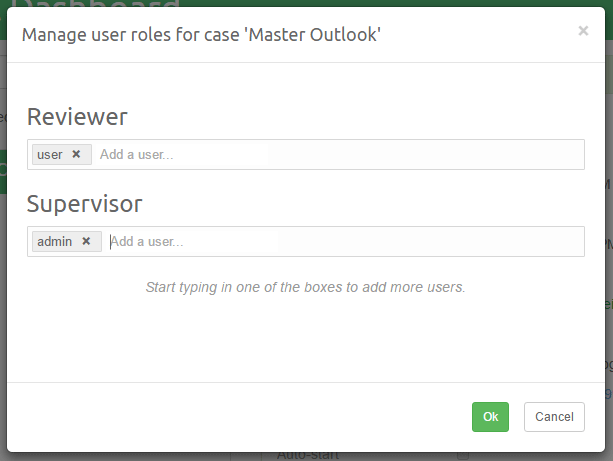
The purpose of this view is to list the roles defined in the RBAC (Role-Based Access Control) model and indicate which users are assigned what roles in this ase. Roles are emphasised by labels with a bright green color. Underneath each role there is a long input box that lists all the users who are assigned that role in this case. Each user can be associated with zero or more roles.
To learn more about users and roles please refer to the User management section.
Important
A user can access a given case only if he is assigned a role with the “Case access” permission!
Assigning roles to users is quite straightforward. Click on the input box for a particular role (e.g. “Reviewer”)
and start typing the desired user name (e.g. “admin” with a lowercase “a”). An autocompletion box will appear with hints about
names available among your user accounts.
Removing a role for a given user is done via clicking on the little x button next to the user name.
Note
Each change to the roles assignment should be persisted by clicking the green OK button. Changes will take effect immediately.
3.4.2. Case alias
Case alias can optionally be changed in order to change the URL on which the case is being shared.
3.4.3. Auto-Start option
Case can optionally be shared with the Auto-start option enabled. The purpose of this function is to specify which cases
should be automatically shared after the Intella Connect server starts. It is a good way of making sure that a certain set of
cases is always available for a review, even when Intella Connect is restarted often.
If the case will fail to start, there should be a trace of this fact left in the Case Logs.
3.4.4. Memory settings
The Intella Connect main process and its child processes (one for each case that you share) are limited by the amount of RAM that the process can maximally use, despite how much memory is installed in the machine. In some cases this limitation can cause issues when reviewing or exporting the data. These issues can be recognized by errors in the log files containing the text “OutOfMemoryError” or “java heap space”.
Setting memory allocation manually might help in this case. To increase these thresholds, select the case in the Case Dashboard and change the “Memory allocation” setting from Auto to Manual and increase the value.
Note that you can never specify more than half of the available system RAM. This is to make sure that when more then one case is shared, those processes and the OS still have sufficient memory available to them.
When the memory issue relates to the processing of evidence files on Intella Node (you may need to contact tech support for that diagnosis), then locate the IntellaNode.l4j.ini file in Intella Node’s program files folder and open it in a text editor. You will typically need administrative privileges to edit this file. Locate the following line:
# -Dintella.serviceMaxHeap=600M
When the “#“ is removed, this instructs Intella Node to use maximally 600 MB of memory for these child processes. Remove the “#” and increase this number to the higher value suggested to you by tech support. You should never put higher value than what your machine and OS supports. For processing of EDB files, a minimum of 3 GB will be necessary, e.g.:
-Dintella.serviceMaxHeap=3G
If Intella Node is running as a Windows Service, the change of memory setting needs to be done in connect-service.bat file in Intella Node’s program files folder. Locate the following line:
set JVM_OPTIONS=-Dintella.maxExtractorServices=auto;-Dintella.logSlowRequests=true;-Dintella.runningAsService=true;
Parameter -Dintella.serviceMaxHeap needs to be added to the end of this line, for example:
set JVM_OPTIONS=-Dintella.maxExtractorServices=auto;-Dintella.logSlowRequests=true;-Dintella.runningAsService=true;-Dintella.serviceMaxHeap=3G;
After editing and saving this file, it needs to be executed in order for this change to be propagated into Windows services system. The file has the following parameters:
- the action that this script performs. It can be one of these values: install, uninstall, start, stop
- Windows user account name
- Windows user account password
An example of executing this file:
connect-service.bat uninstall
connect-service.bat install ./Administrator password
Note
It is not required to uninstall the service if it wasn’t previously installed.
3.5. Reviewing with Intella Connect
The case is now ready for access from any device having access over the network to the PC running Intella Connect.
A user with the appropriate permission can connect to a case by entering a case URL in his favorite web browser.
In the example above the case URL is:
You should point users to the same URL you are using to access the Intella Connect Dashboard which is (in the example above):
Based on their role they will be redirected to the User dashboard where the cases they have access to will be listed and where they can change their avatar image.
Note
The remote computer has to have TCP/IP access to the computer specified as the Intella Connect server.
After logging, the reviewer is presented with User Dashboard where cases he have access to are listed.

Aftere selecting a case, the reviewer can start reviewing it.
3.6. Troubleshooting port conflicts
If you are getting the following error message:
It could mean that there is an application already running on the host computer that is utilizing port 9999 (this section assumes that you have not changed the default port, however, if you did change it as described in changing a default port, then please use that port for troubleshooting purposes). To confirm this, make sure that Intella Connect is not running. Then open a command prompt window and type:
NETSTAT –a
Then look for port 9999 and see what the state is in the row:

If there is a port conflict, you can change the default port of Intella Connect as described in changing a default port.